On the Go 2.0 – Patterns byAnnie

#patternsbyannie, #bag, #handbag, #onthegopattern, #rubystarsociety

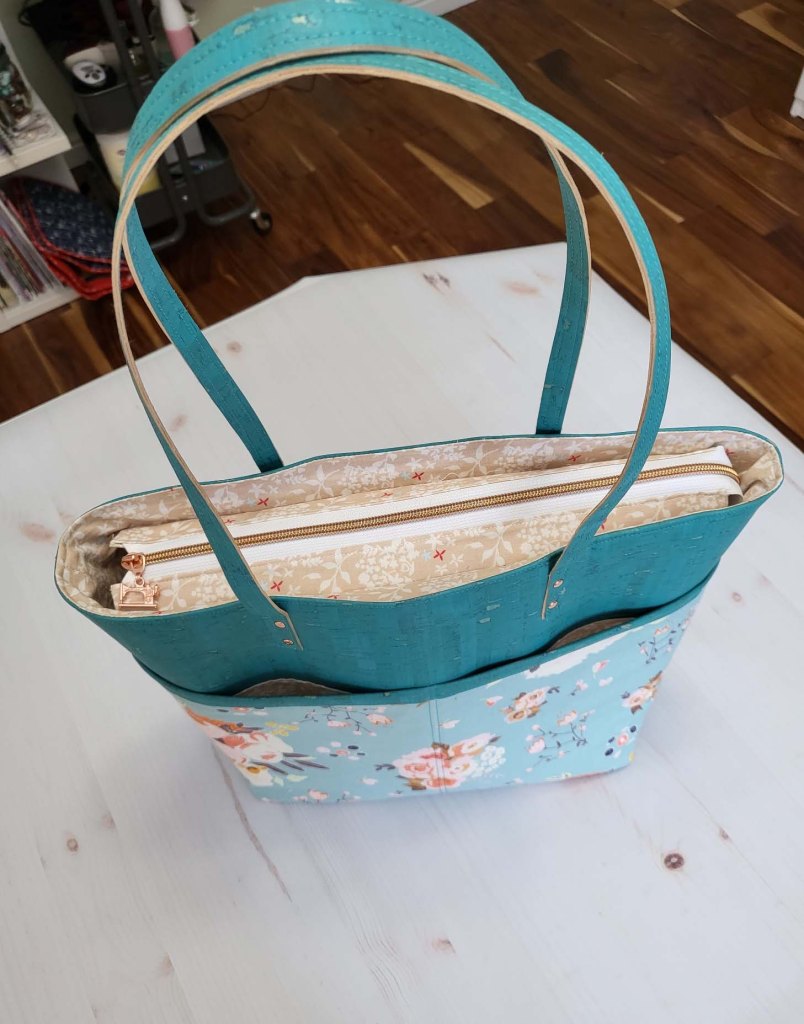
I have been enjoying all things strawberry this summer. I purchased a fat quarter bundle of strawberry fabrics by Kimberly Kight for Ruby Star Society while I was traveling through Delaware for the recent Mid Atlantic Shop Hop. I love these fabrics so much! I paired a few of the fat quarters with this pattern:

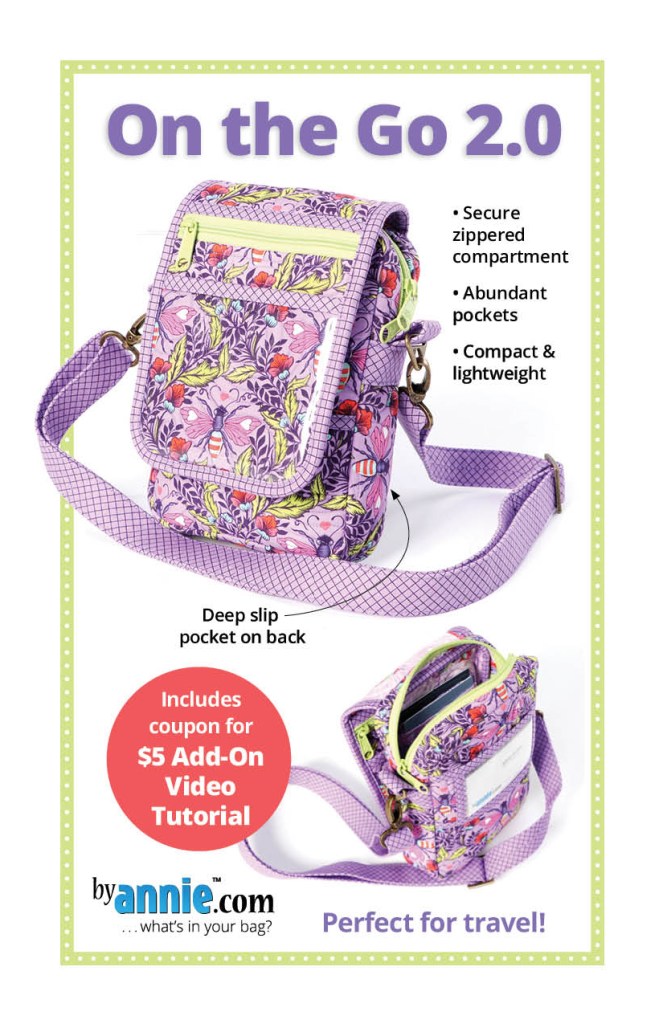
I’ve sewn up a number of patterns from byAnnie in the past, and I was never disappointed with the end result. The instructions are easy to follow; they offer free add-on videos for a number of their patterns; and the supplies are easy to find.

The pattern calls for 1/2 yard cuts of main, lining, and binding fabrics. Since I only had fat quarters, I used several different prints for my bag. It is a bit scrappy, but all the fabrics are from the same line, so they coordinate nicely.

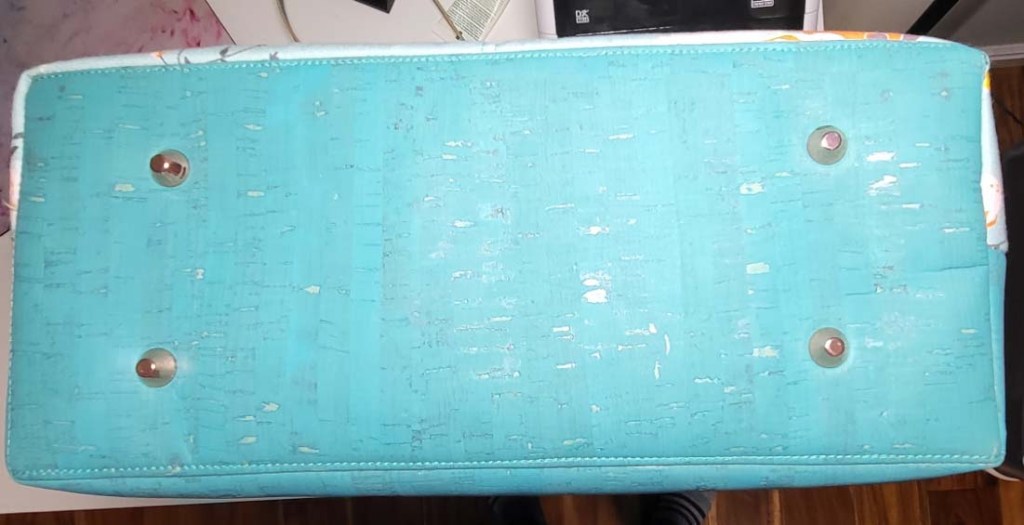
I have quite a bit of bag hardware left from when I closed my Etsy shop in 2023. I did not want to buy supplies for my bag, so I used what I had on hand. The strap slider and the triangle rings are iridescent rainbow by Emmaline Bags, and the swivel hooks are nickel finish designer profile by Emmaline Bags.

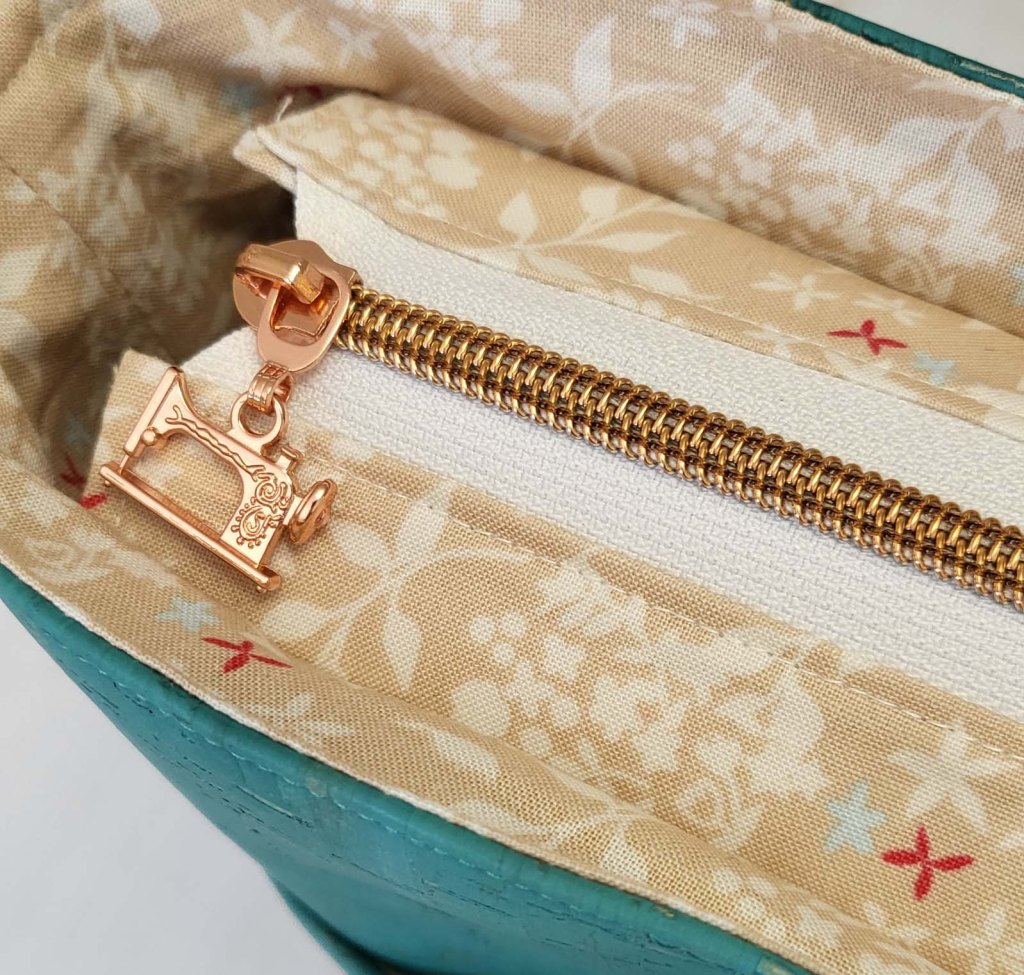
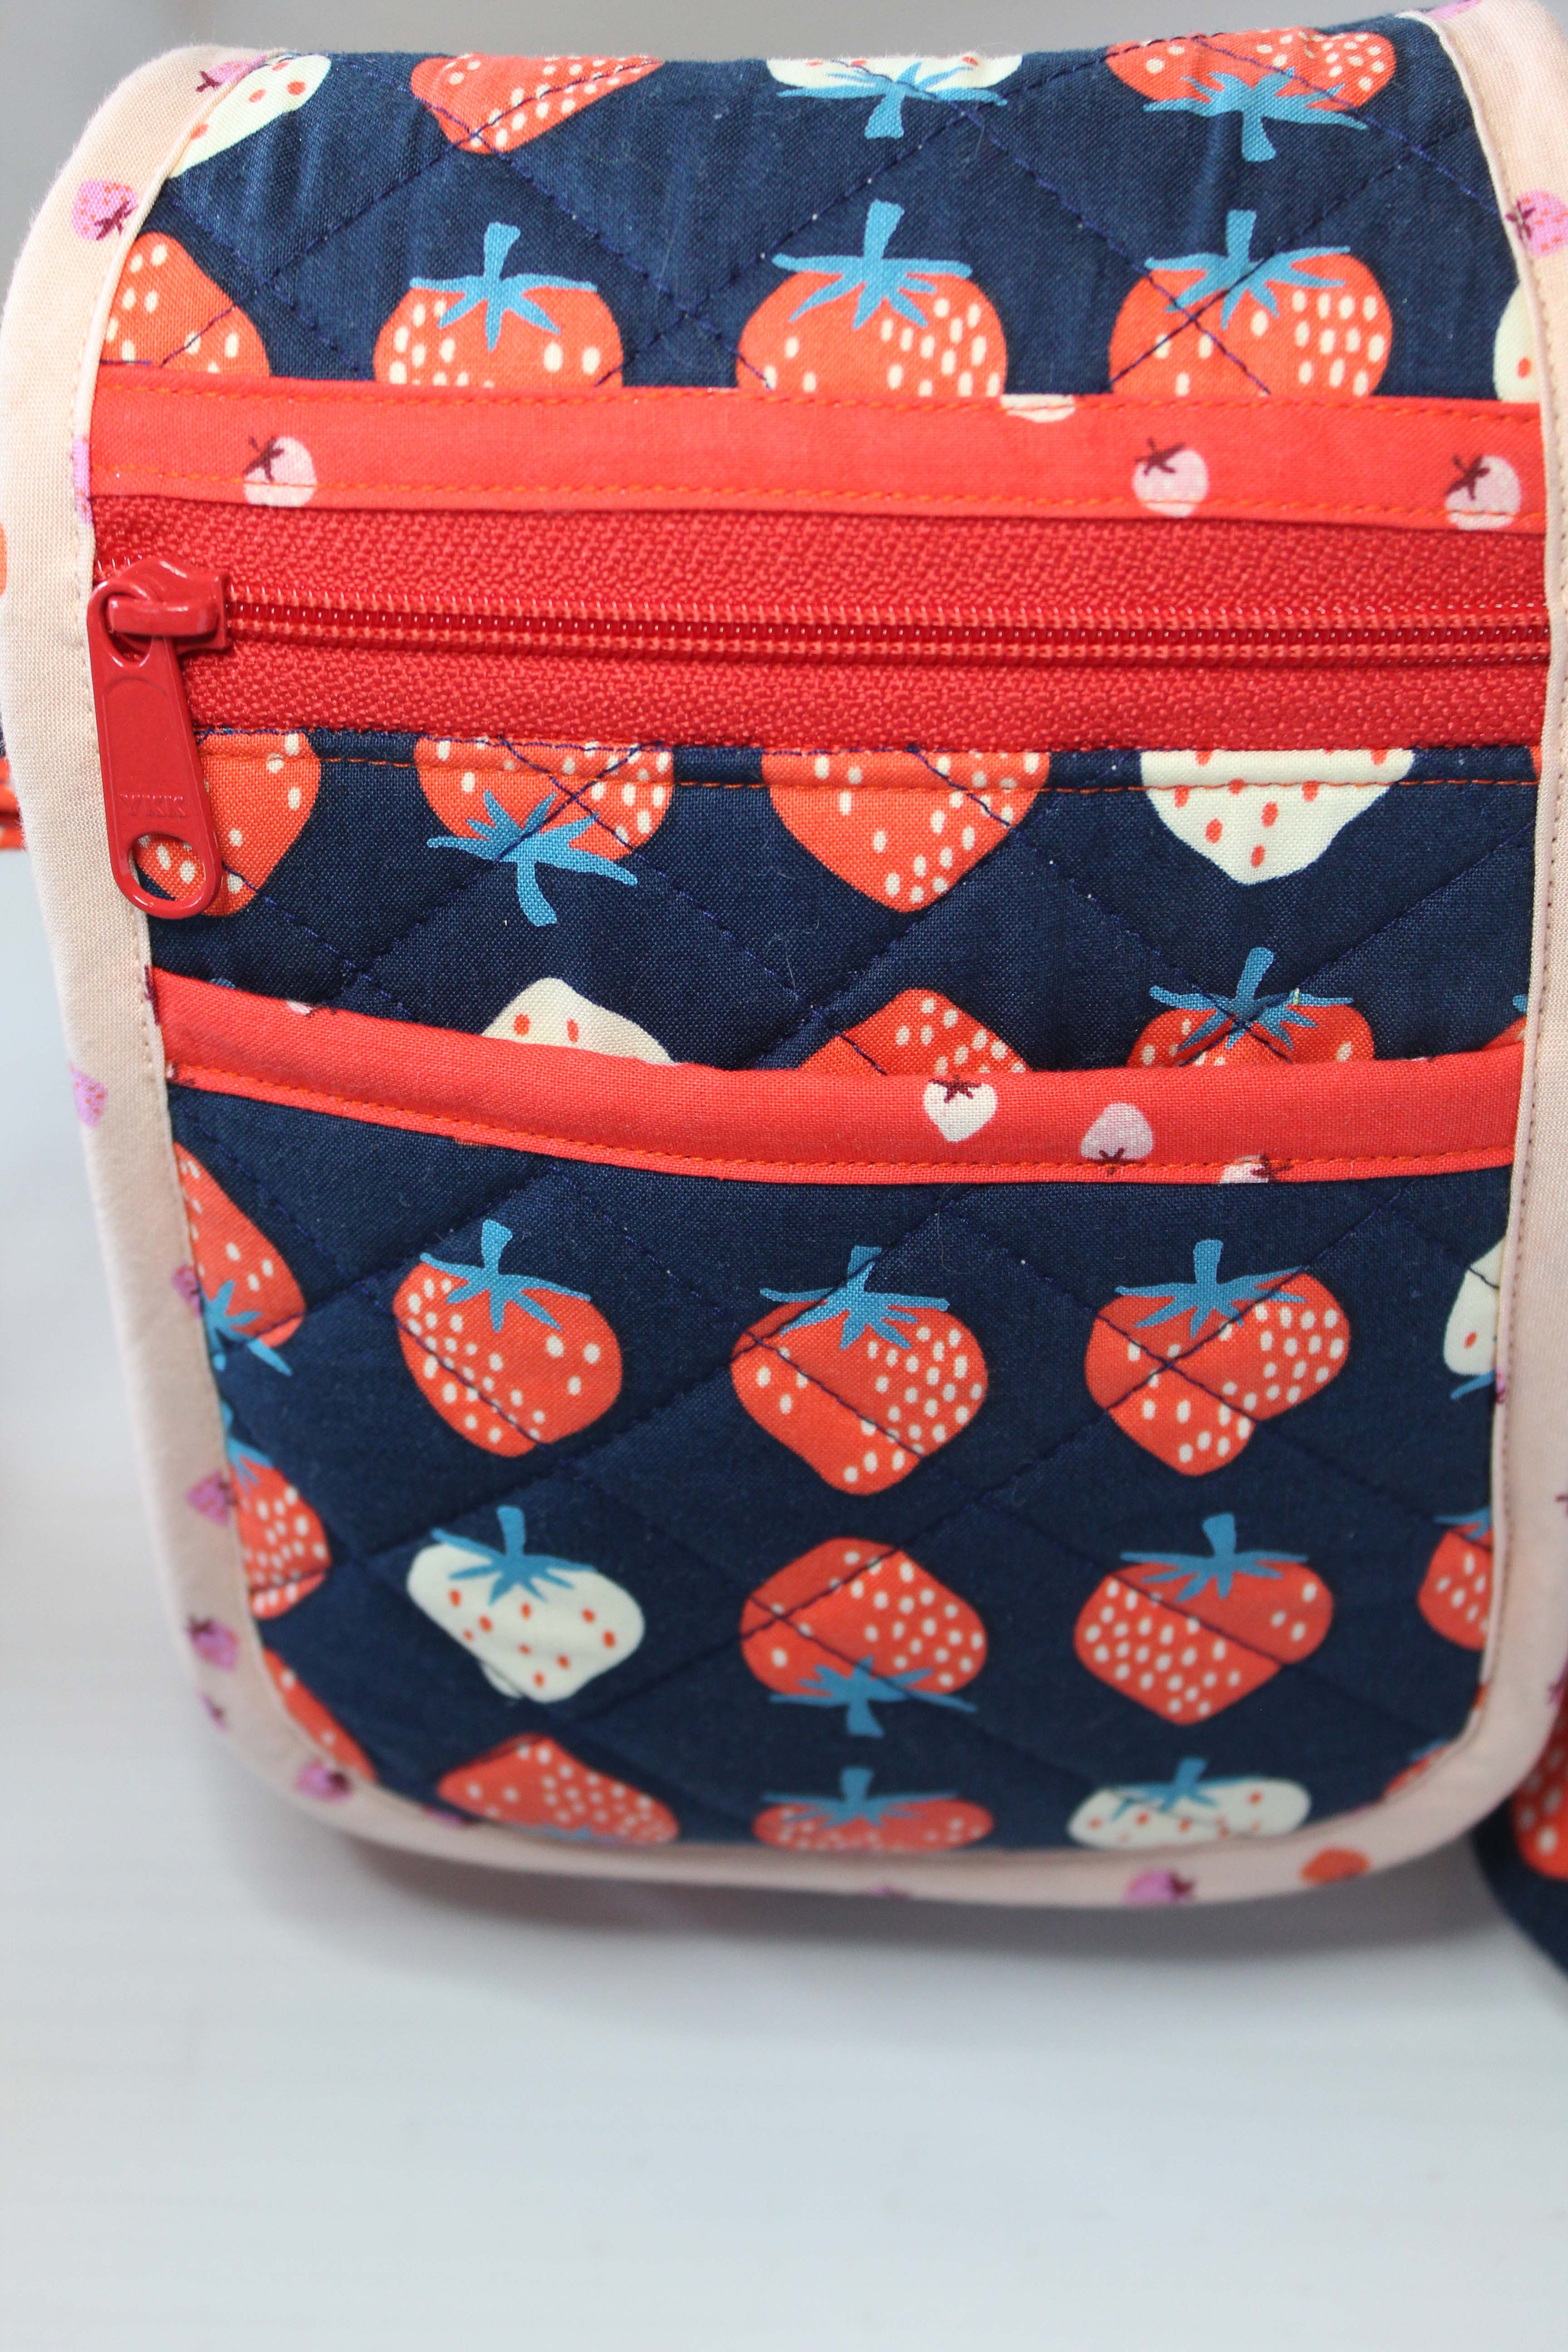
The zippers are handbag zippers from byAnnie.

The front flap has a hidden magnetic closure. I did not have any magnetic closures from byAnnie or from Emmaline Bags. All I had on hand was an invisible magnet by Dritz. Trust me, don’t use that one. It is not strong enough to penetrate all those layers of fabric and foam. My completed bag would not stay closed *sigh* I ended up purchasing one of the the oh so powerful Emmaline Bags bar magnets from my local quilt shop. I had to perform tedious surgery on the inside of my bag and replace the Dritz magnet with the new bar magnet. It wasn’t pretty, but I patched it up and nobody will see it, but me. The flap on my bag now stays in place.

The flashy little berry charm is by Kate Spade. It was on a bag that my daughter gifted to me.

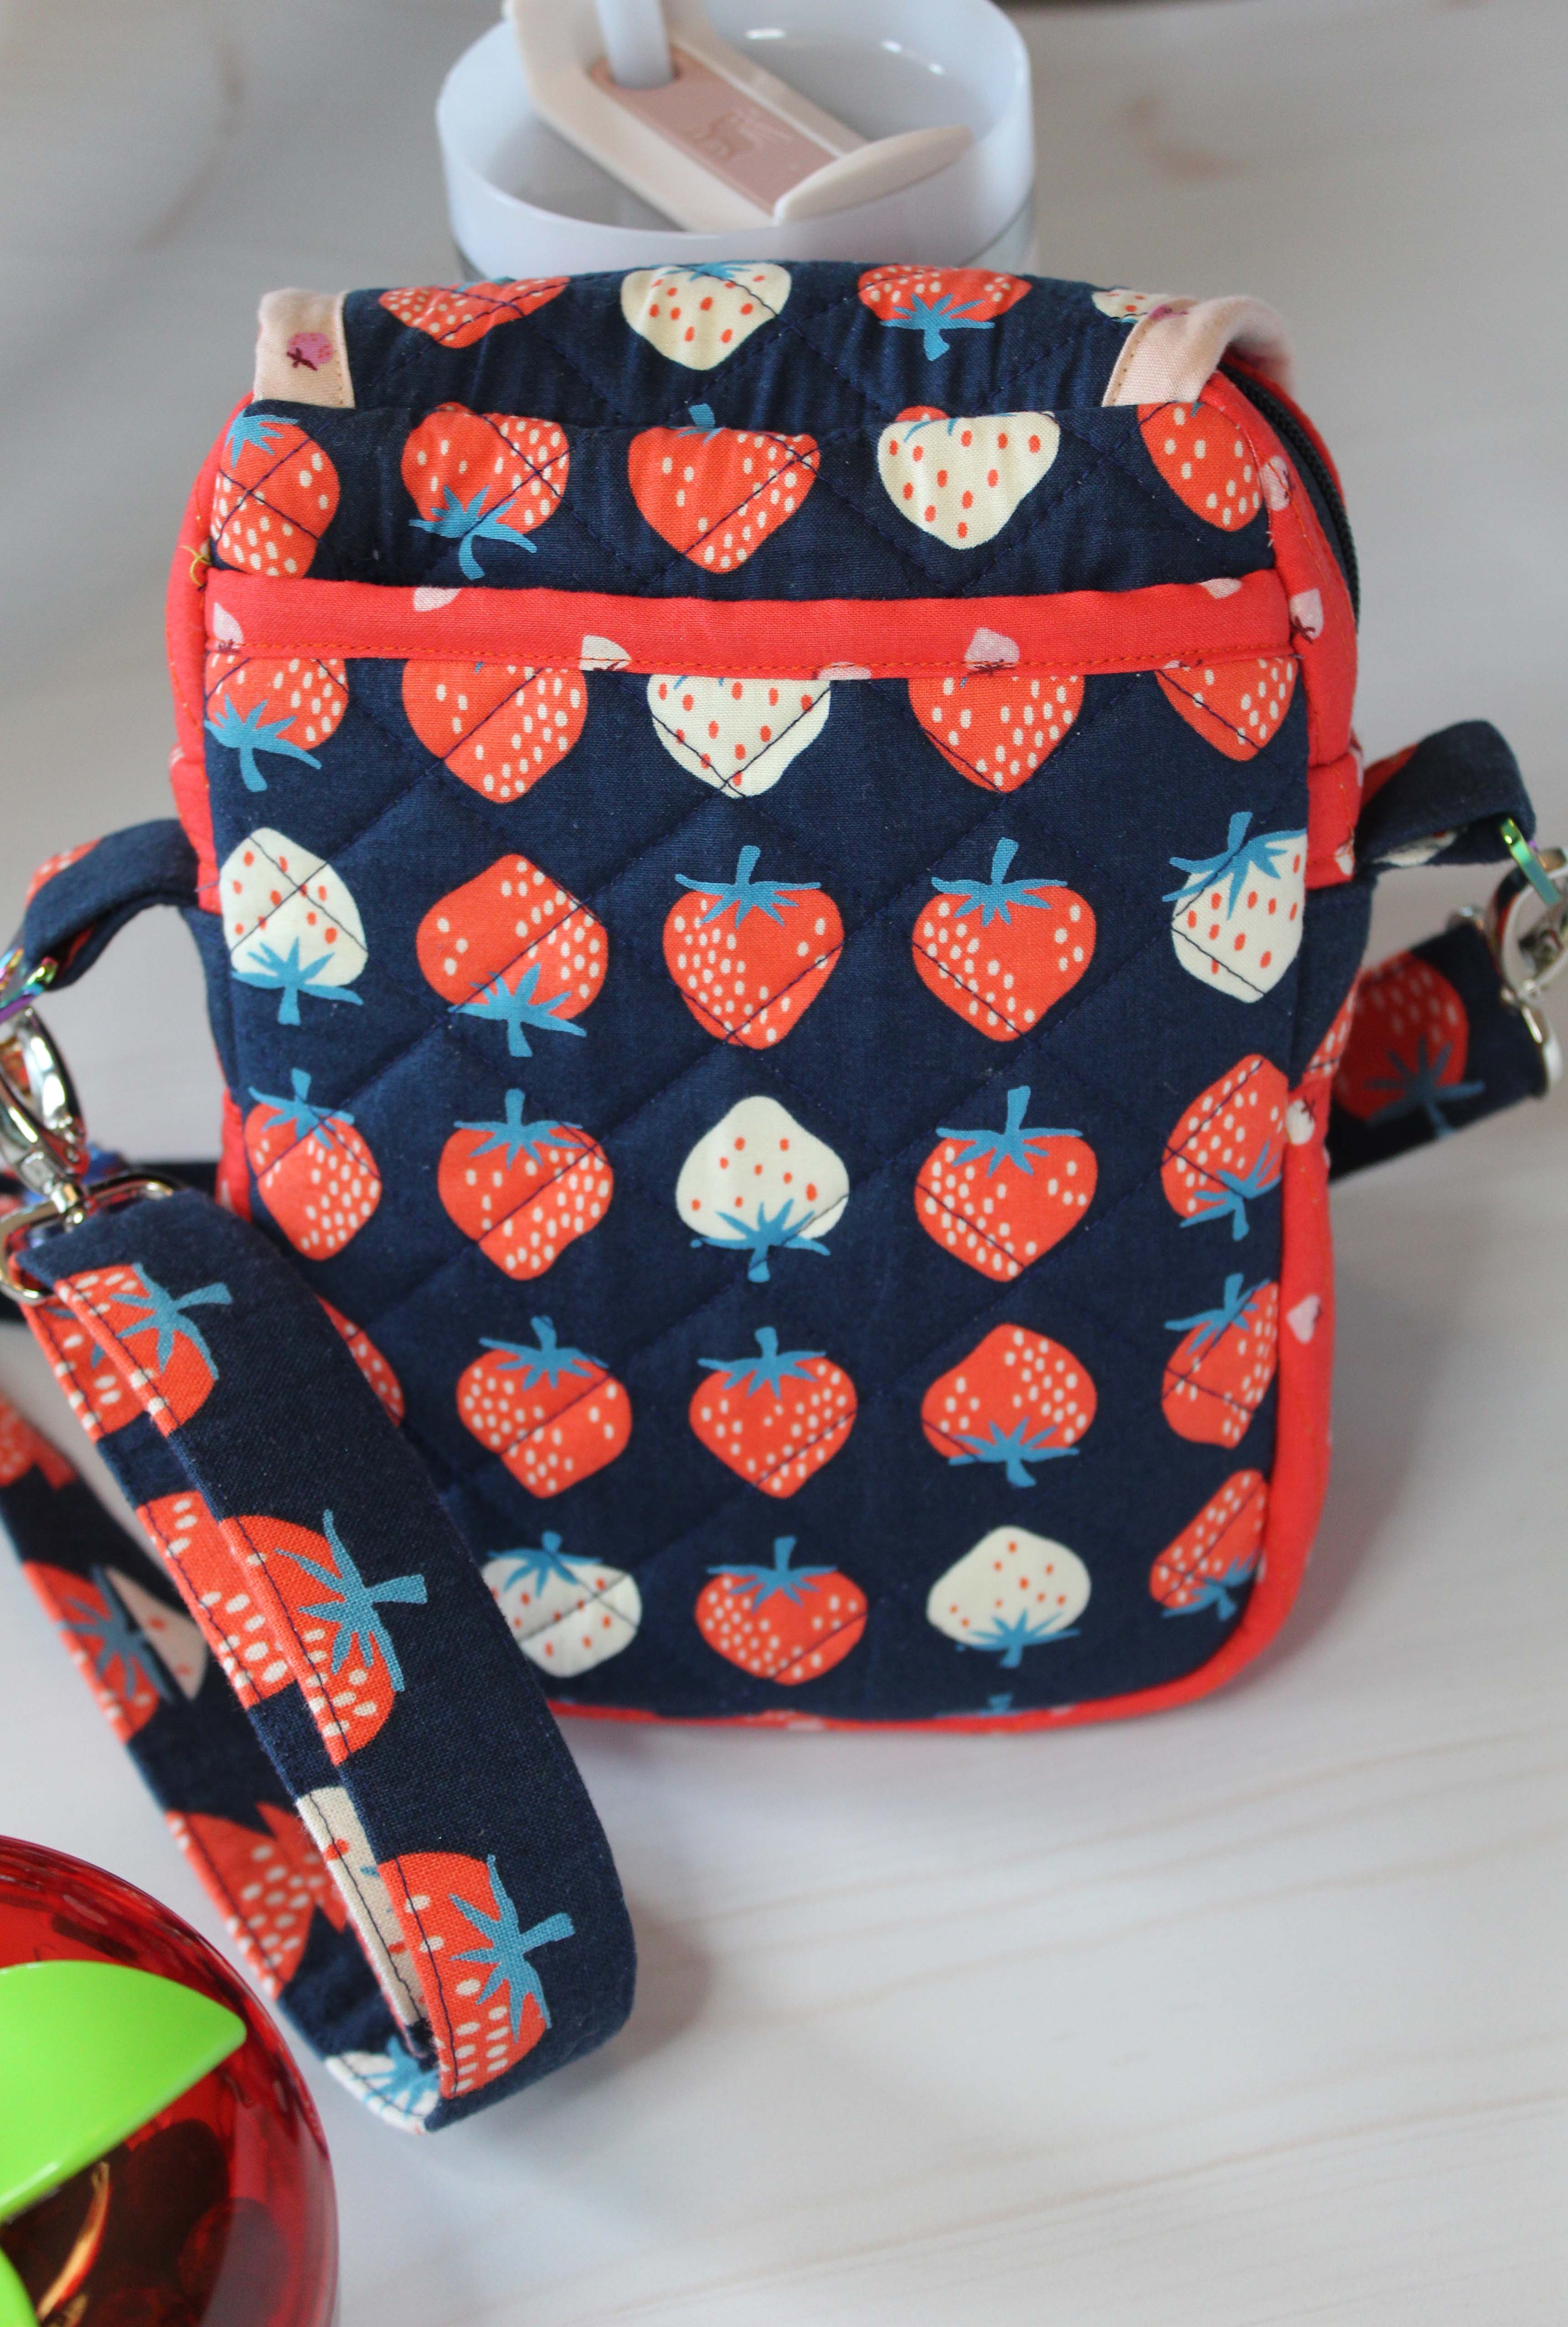
The back exterior features a nice size slip pocket, and the front flap exterior includes a smaller size slip pocket along with a large zipper pocket.

Underneath the flap, on the front exterior is a vinyl ID pocket.

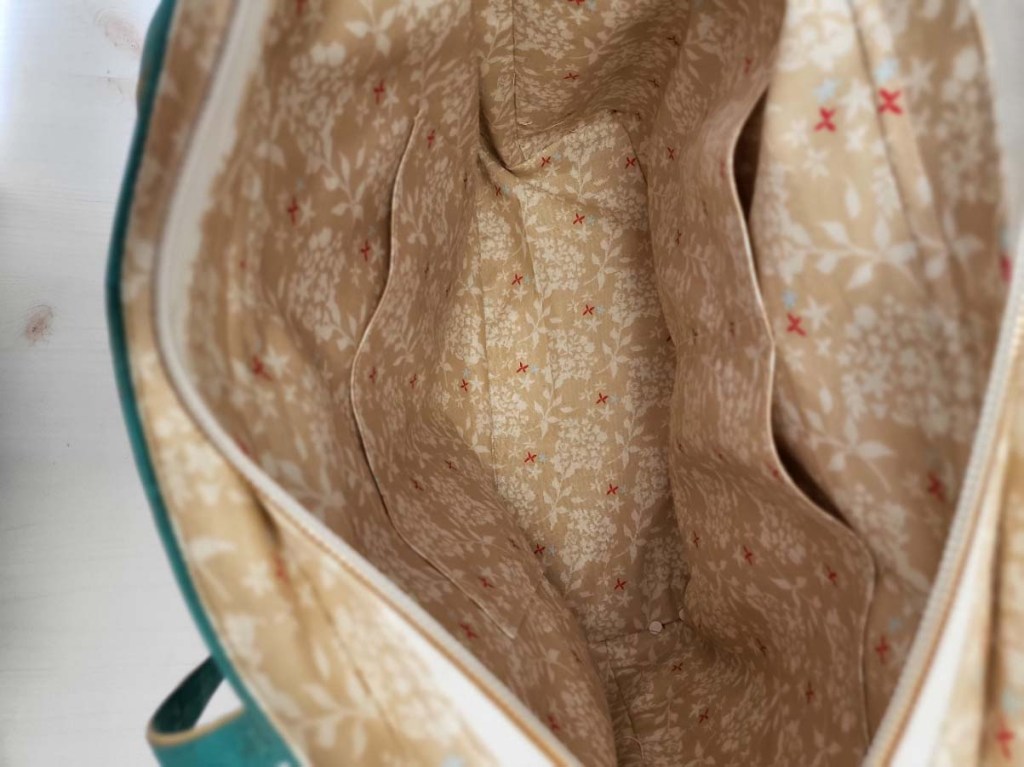
The only interior pockets are three card slots. If I make another On the Go 2.0, I will add a narrow pen slip pocket. My pens fall to the bottom of the bag and I have to remove my wallet and sunnies to get to them.

All in all, this is a handy little bag to add to my handbag wardrobe. It can be worn as a cross body bag when you need your hands free; or it can be worn over the shoulder for everyday activities. If you are in the market for a new bag, I would encourage you to give this one a sew. I’m thinking of stitching up a lovely version using Tilda fabrics.

Let me know in the comments if you have sewn any byAnnie patterns.

The Miranda Tote

The Miranda Tote is a quick, satisfying sew. The instructions are well written, and as a bonus, Sallie Tomato has a sewing tutorial on You Tube. So if you are fairly new to bag making, this might be a good option for you.

The finished dimensions are 11.5″ wide x 12″ high x 5″ deep. That’s a good size tote! Here I have it loaded up with some orders from my shop. Time to head to the post office!

The bag features a recessed zipper top closure to keep your contents secure. I used a Sallie Tomato zipper by the yard in white with rose gold zipper teeth.

I added a rose gold sewing machine zipper pull for a cute touch.

And a copper zipper end gives a polished finish to the zipper as well as stability when pulling the zipper closed.

After inserting the lining and turning the bag right side out, I added a plexiglass insert into the bottom of the bag between the lining and the outer bag. This gives lots of stability when the bag is full. No saggy bottom!!!

I simply purchase a small piece of plexiglass at my local Home Depot and my husband uses his table saw to cut it to the size I need. He then rounds the corners with his sander so they don’t poke through the fabric in my bag. I insert it through the opening that I left in the lining, then I hand stitch the lining closed.

There are four rose gold, bucket style bag feet on the bottom of my bag. I used a small piece of foam stabilizer on the wrong side of the cork. Once I inserted the prongs of the bag feet through the cork and foam, I added some Gutermann Creativ glue to the prongs and foam for extra security.

I sewed up the bag just as the instructions indicated with a single pocket on one side of the lining and a double pocket on the opposite side of the lining. One thing I would change in my next bag, is that I would add SF101 (or similar) interfacing to the inner pockets. The pattern does not call for interfacing on these pattern pieces (piece M and piece N), but I would highly recommend interfacing them. Without interfacing, the pockets are somewhat ‘floopy’.

The outside front of the bag has two large slip pockets. Those pockets don’t seem to need interfacing. They keep their shape just fine. I used Soft and Stable from byAnnie to give structure to the body of the bag. I used rose gold rivets to give added security to the stitched on handles. The handles are only 1/2″ wide. I find that size handle to be just a bit narrow for this size bag. My next one will have about 3/4″ to 7/8″ wide handles.

I used turquoise cork for my main fabric; quilting cotton from Minki Kim’s Hidden Cottage line for the outer pockets; and quilting cotton from Minki Kim’s Someday line for the lining. My Baby Lock Destiny II does not like to sew through cork, foam, and cotton, so I used my old Viking Mega Quilter to stitch my bag together.

All in all, this is a terrific tote. I highly recommend this pattern for confident beginner sewers to experienced sewers.

Thank you for spending some of your day with me today, sewing friends. Please leave me a hello in the comment section.

A Natural Pair – Ultra Blue Star Petunia/Tahiti

Happy Saturday, Sewists!
I love petunias because they bloom their little hearts out
in the heat of summer or the cool of spring and fall.
I can always count on my petunias to greet me with glorious color.

This one is the blue star petunia.
I’ve paired it with the By Annie Handbag zipper in Tahiti.
This picture is not re-touched.
I took it midday in the bright sunshine.

From the Wasatch Shadows Nursery here in Utah:

Ultra Blue Star Petunia will grow to be about 12 inches tall at maturity, with a spread of 12 inches. When grown in masses or used as a bedding plant, individual plants should be spaced approximately 10 inches apart. Its foliage tends to remain dense right to the ground, not requiring facer plants in front. This fast-growing annual will normally live for one full growing season, needing replacement the following year.
This plant should only be grown in full sunlight. It does best in average to evenly moist conditions, but will not tolerate standing water. It is not particular as to soil type or pH. It is highly tolerant of urban pollution and will even thrive in inner city environments. This particular variety is an interspecific hybrid. It can be propagated by cuttings; however, as a cultivated variety, be aware that it may be subject to certain restrictions or prohibitions on propagation.
Ultra Blue Star Petunia is a fine choice for the garden, but it is also a good selection for planting in outdoor containers and hanging baskets. It is often used as a ‘filler’ in the ‘spiller-thriller-filler’ container combination, providing a mass of flowers against which the thriller plants stand out. Note that when growing plants in outdoor containers and baskets, they may require more frequent waterings than they would in the yard or garden.
The By Annie handbag zipper in Tahiti is a popular color in my shop and you can see why.  It is a vibrant, beautiful purple color.
Thanks so much for stopping by.  Have a terrific weekend.