I used one of Annie Unrein’s (Patterns by Annie) newest patterns:
Running With Scissors to sew this useful case.
The name of the pattern itself is clever,
but the assembly instructions for this one
are some of the most clever from any of the Patterns by Annie.
I started by quilting my main fabric, Soft and Stable,
and lining fabric together using my Block Rockit quilting machine.
BTW, I have my 14″ Block Rockit on a 5 foot frame.
In my opinion, that is the perfect set up for a bag maker such as myself.
The cotton quilting fabric that I use is 44/45 inches wide,
which fits perfect on the 5 foot frame.
Also, I don’t ordinarily quilt large quilts, just lap size,
so my set up stays this way all the time.
I prefer to quilt my fabrics and soft and stable all in one large piece
because cutting of all the components of the bag goes very quickly
after the fabric is all quilted.
Patterns by Annie usually follow a general set of steps.
In case you missed it, click
here for my blog post on those steps.
There is an updated method of sewing the handle and “spine” support for this pattern.
It is different from other By Annie patterns that I have sewn in the past.
I really, really like the new method.
It helps keeps the top of the bag from bowing when it is filled with your supplies.
Speaking of supplies, you can fit a plethora of sewing supplies
(or whatever type of supplies you plan to carry) in this handy case.
The interior of the spine features fold-over elastic bands to hold items such as spools of thread.
And there are numerous slots and zippered pockets (vinyl, mesh, and quilted fabric).
Another plus about this pattern, is that the construction is done flat.
← Interior
Exterior→
The zipper does not go in until the interior and exterior have been completed.
After the zipper and zipper tab are done,
the binding is added and that is the last step.
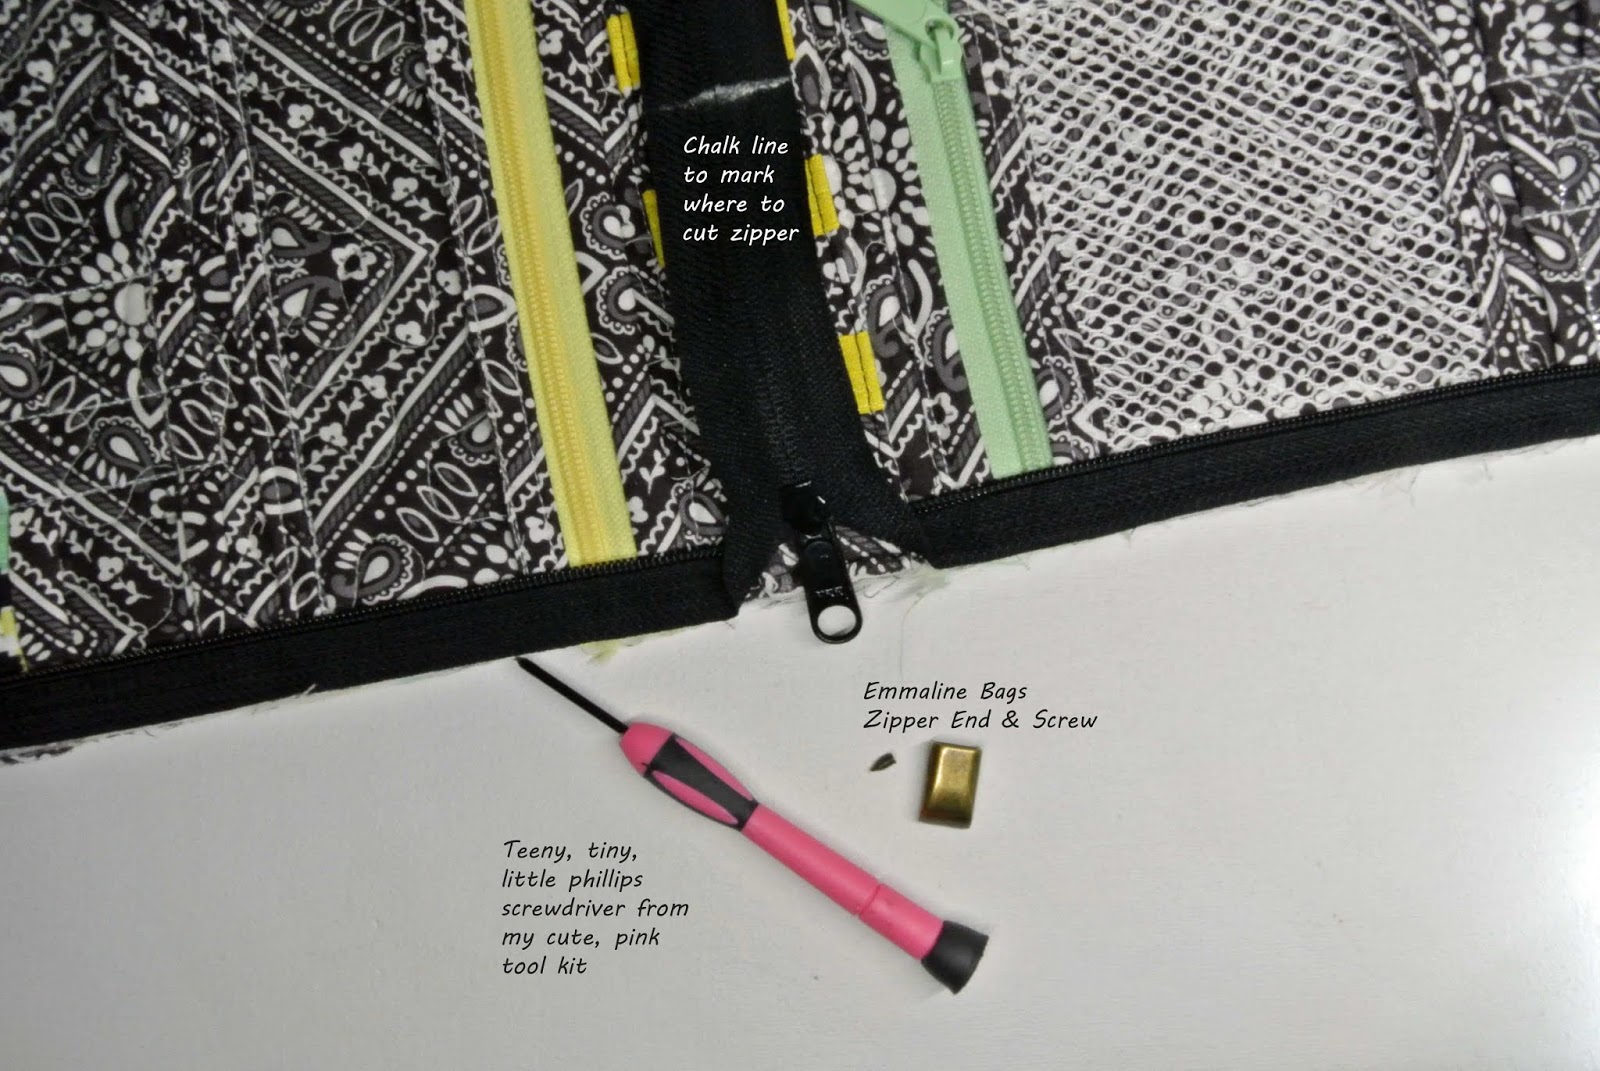
Here is what I have to say about the zipper and tab:
1. After inserting the zipper, cut it the length instructed in the pattern,
then, if it is too long for your taste, cut a little off at a time until it is the length you wish
(for my personal taste, this zipper tail is too long, so I plan to cut it down by about half).
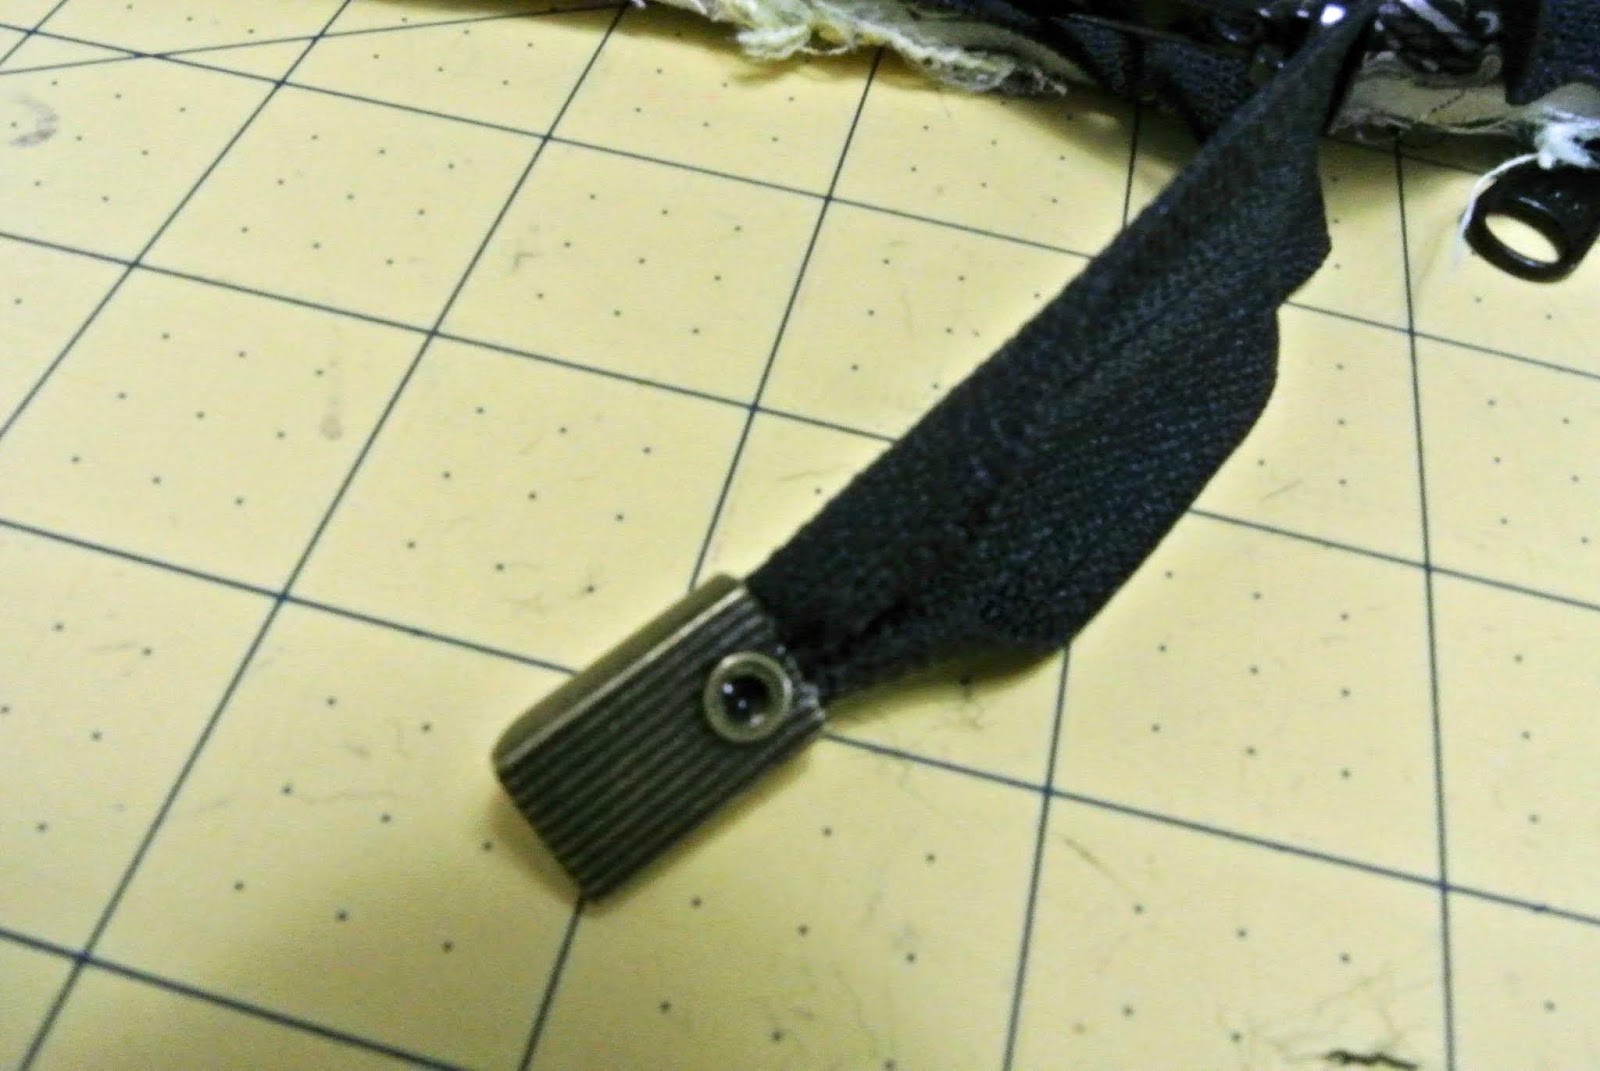
2. Add a metal zipper end for a more professional touch:
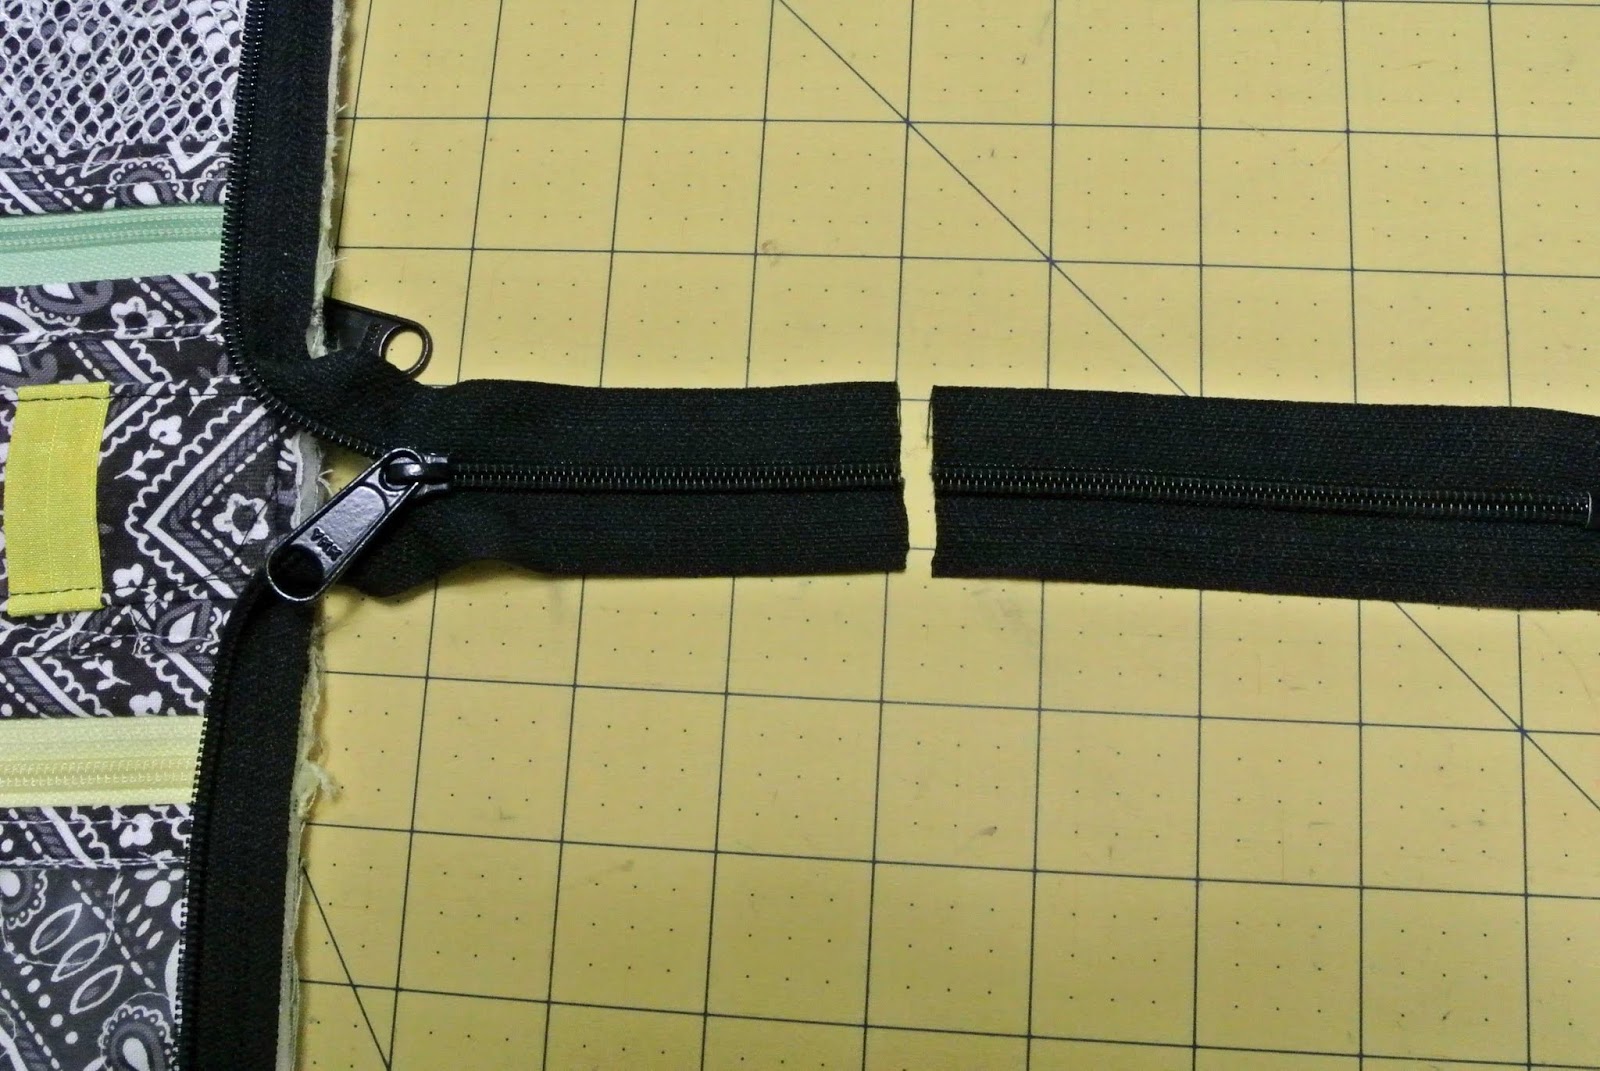
Gather your zipper end supplies and mark the length of your zipper
Cut the zipper along your marked line (DO NOT use your good fabric scissors)
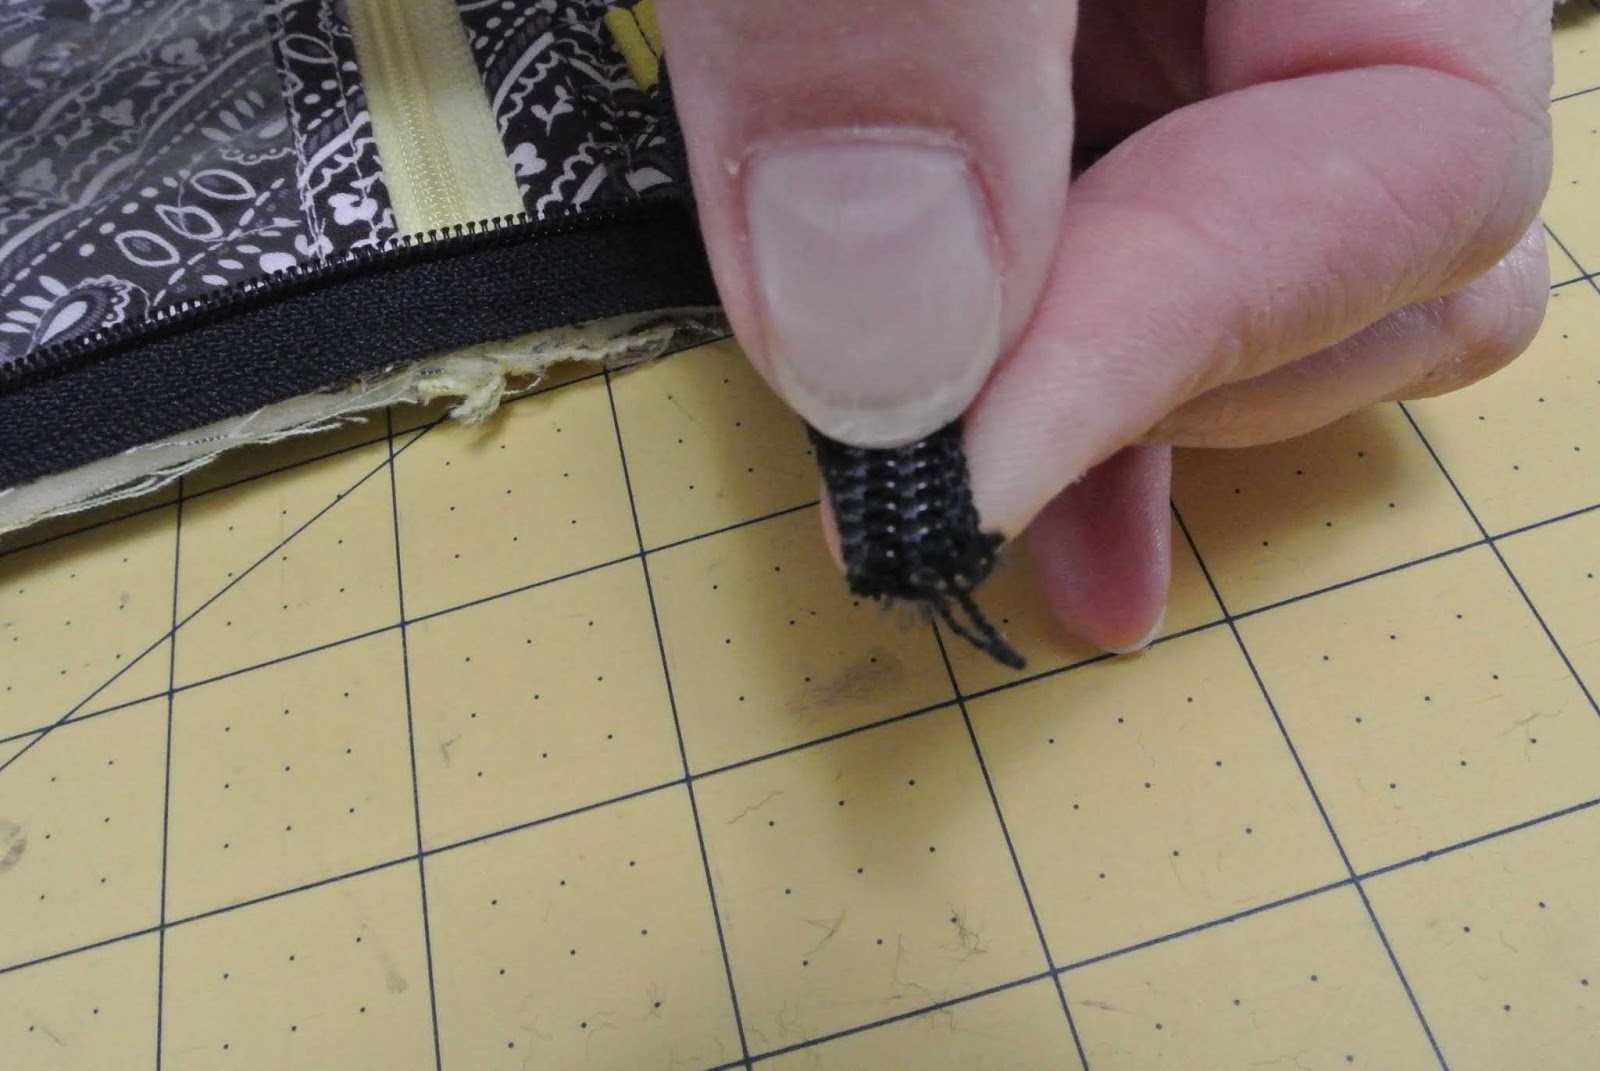
Roll the sides of the zipper toward the center on the wrong side of the zipper
Use a dab of glue for added security
(my favorite is Guterman HT2, available on Amazon)
Push the zipper down into the zipper end as far as it will go
and allow the glue to set for about 30 minutes
Add the teeny, tiny little screw that comes with the zipper cord end,
and tighten it down with a teeny, tiny screwdriver
Here’s what it looks like on the top side
In case you haven’t had enough of my ramblings,
here’s a video to give you a closer look at my tool case:
Thank you so much for reading my blog.
Have a terrific time sewing your own tool case.