Serger Sundress

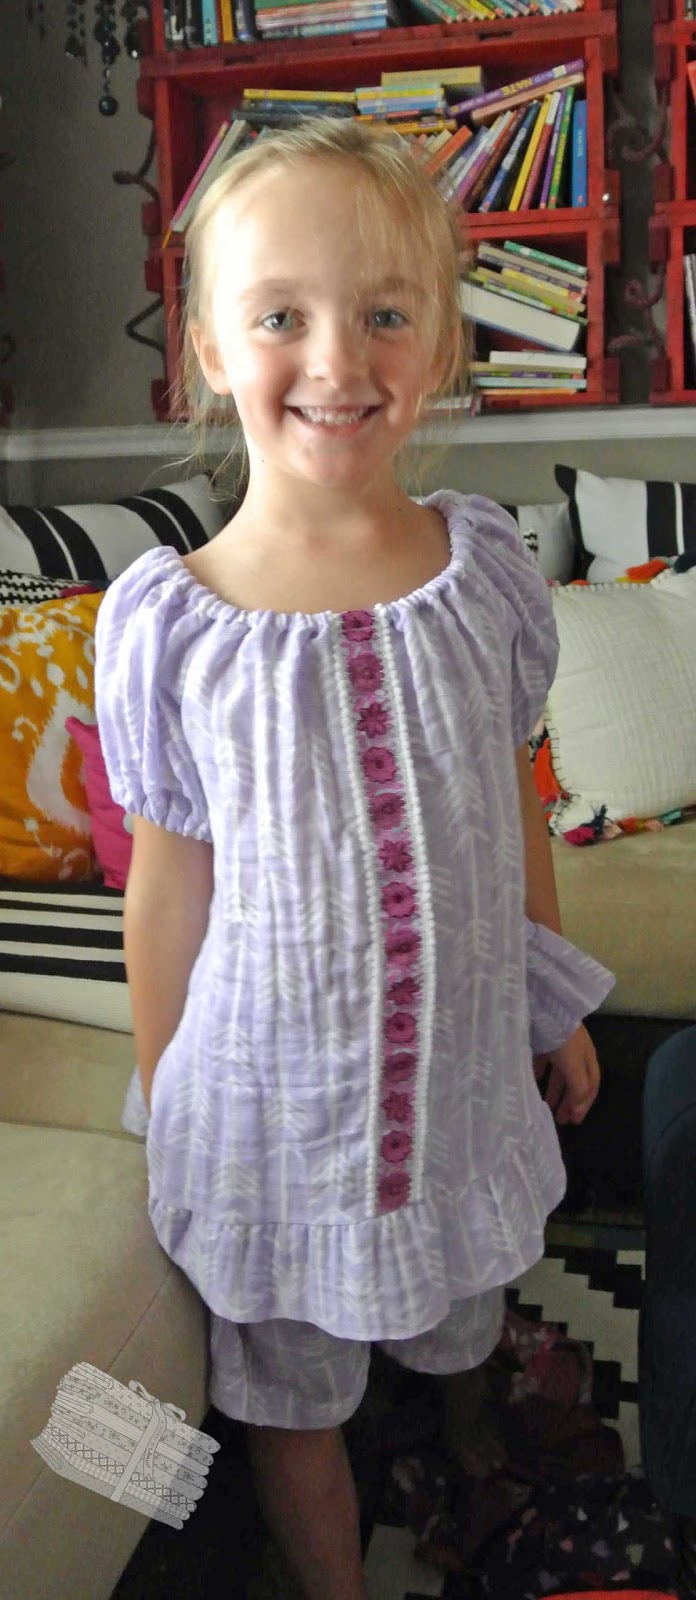
#marthapullenlicensedteacher  #sundress #serger #sewing
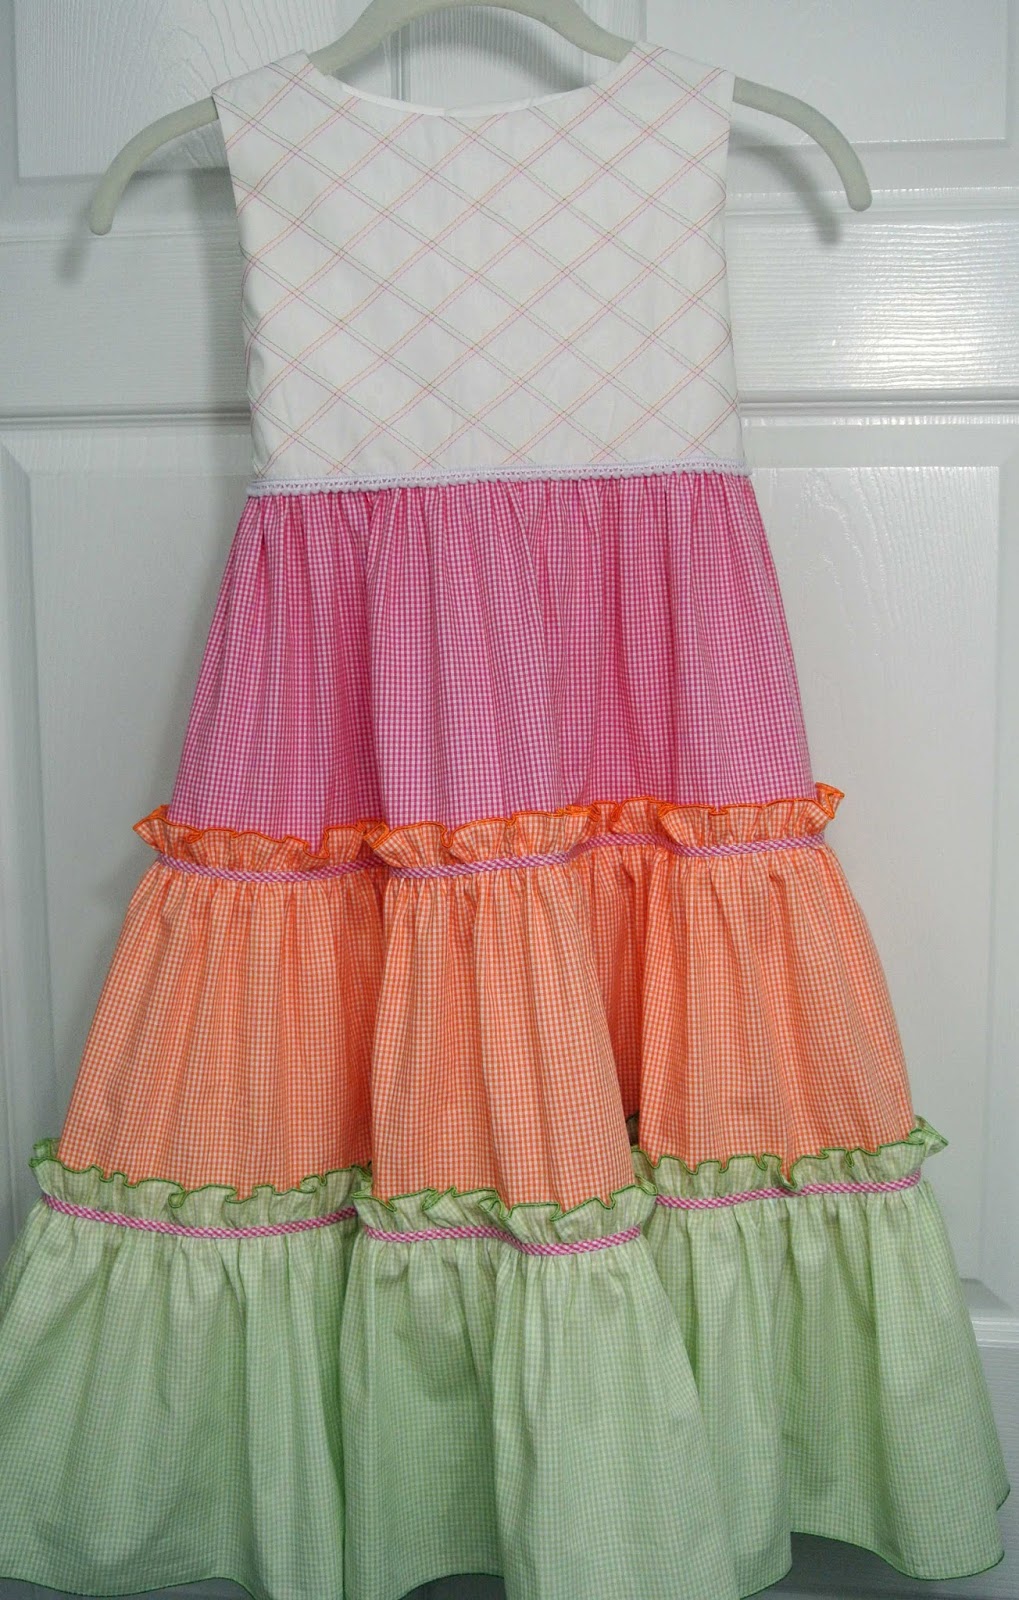
Happy May, sewing friends!
This is the May serger pattern that you will receive if you are
in my #sergerclub.

The beautiful gingham fabric and spaghetti bias can
be ordered from Chadwick Heirlooms in Virginia.
No, I do not receive any compensation from Chadwick Heirlooms,
I just know they stock these supplies because I order from them.
😊

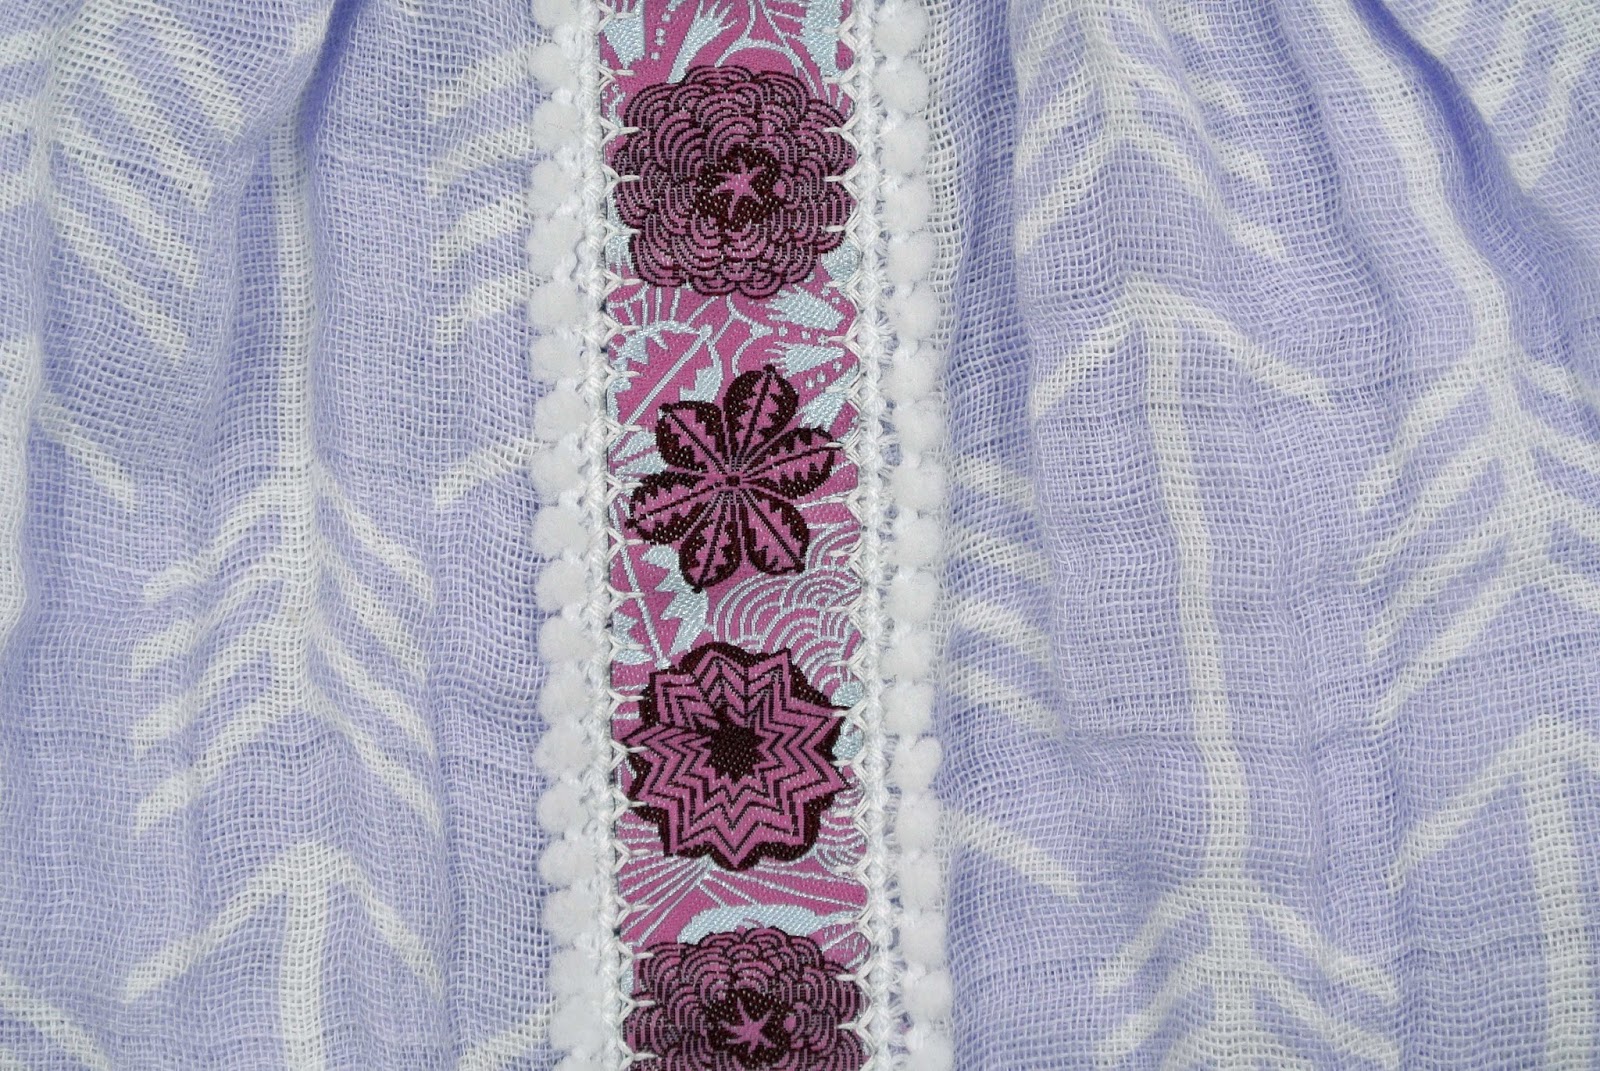
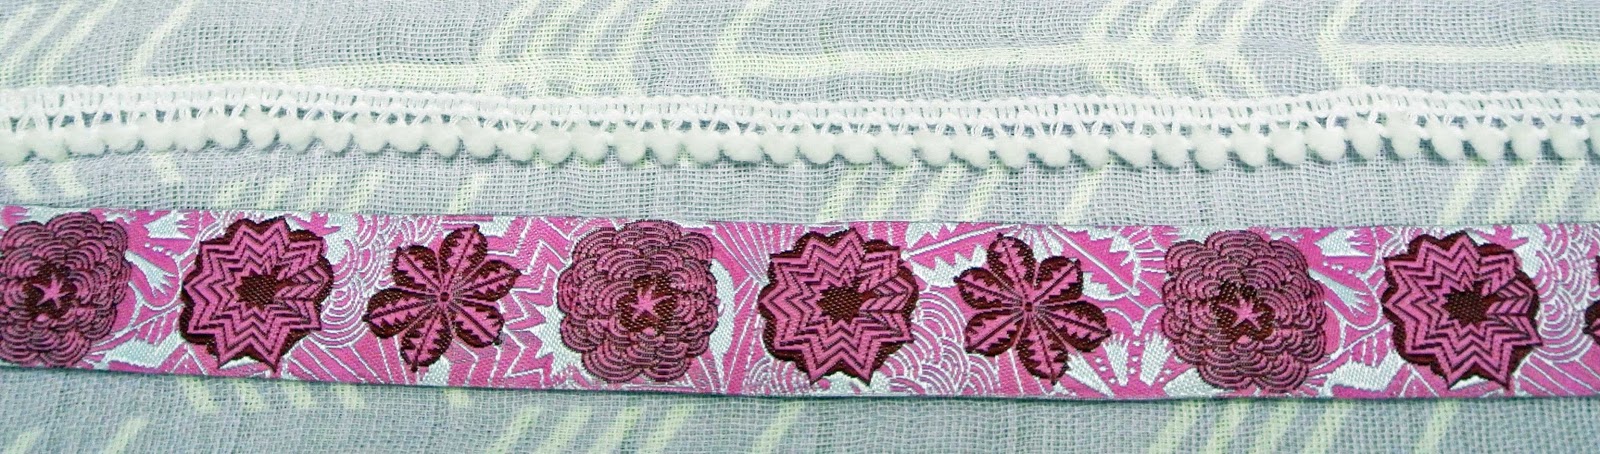
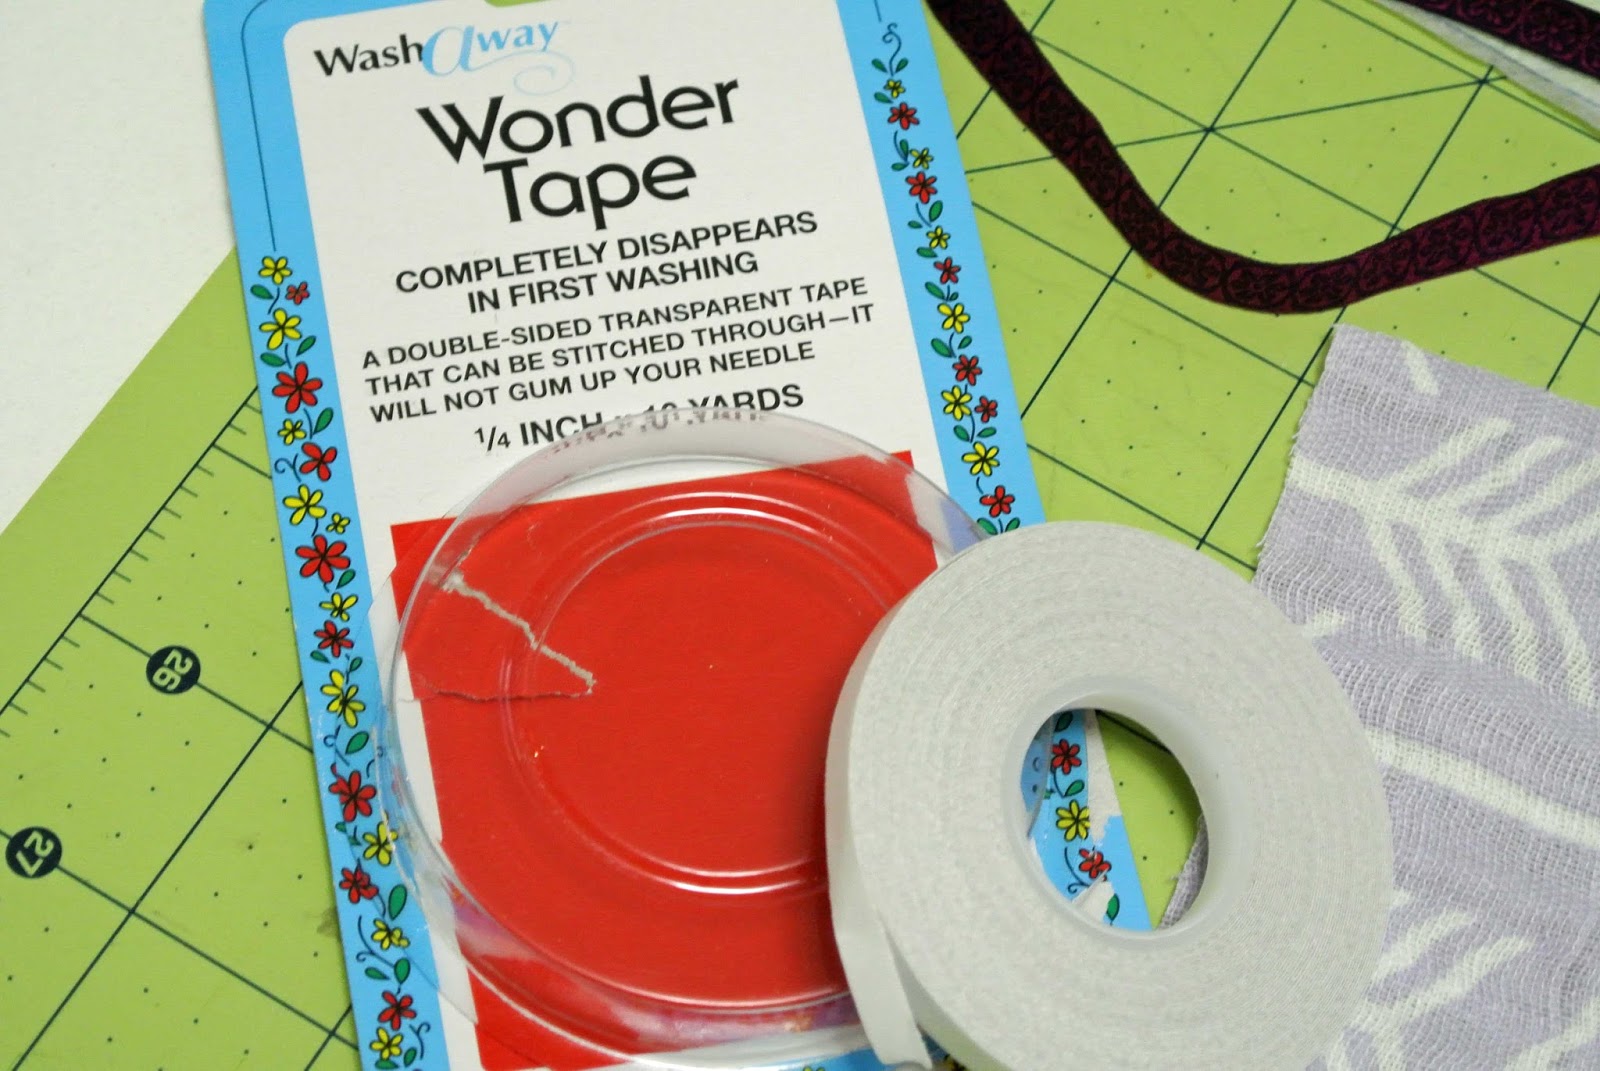
I had the mini pom pom trim in my stash, so I used it instead of the
spaghetti bias braid around the bodice/ruffle seam.
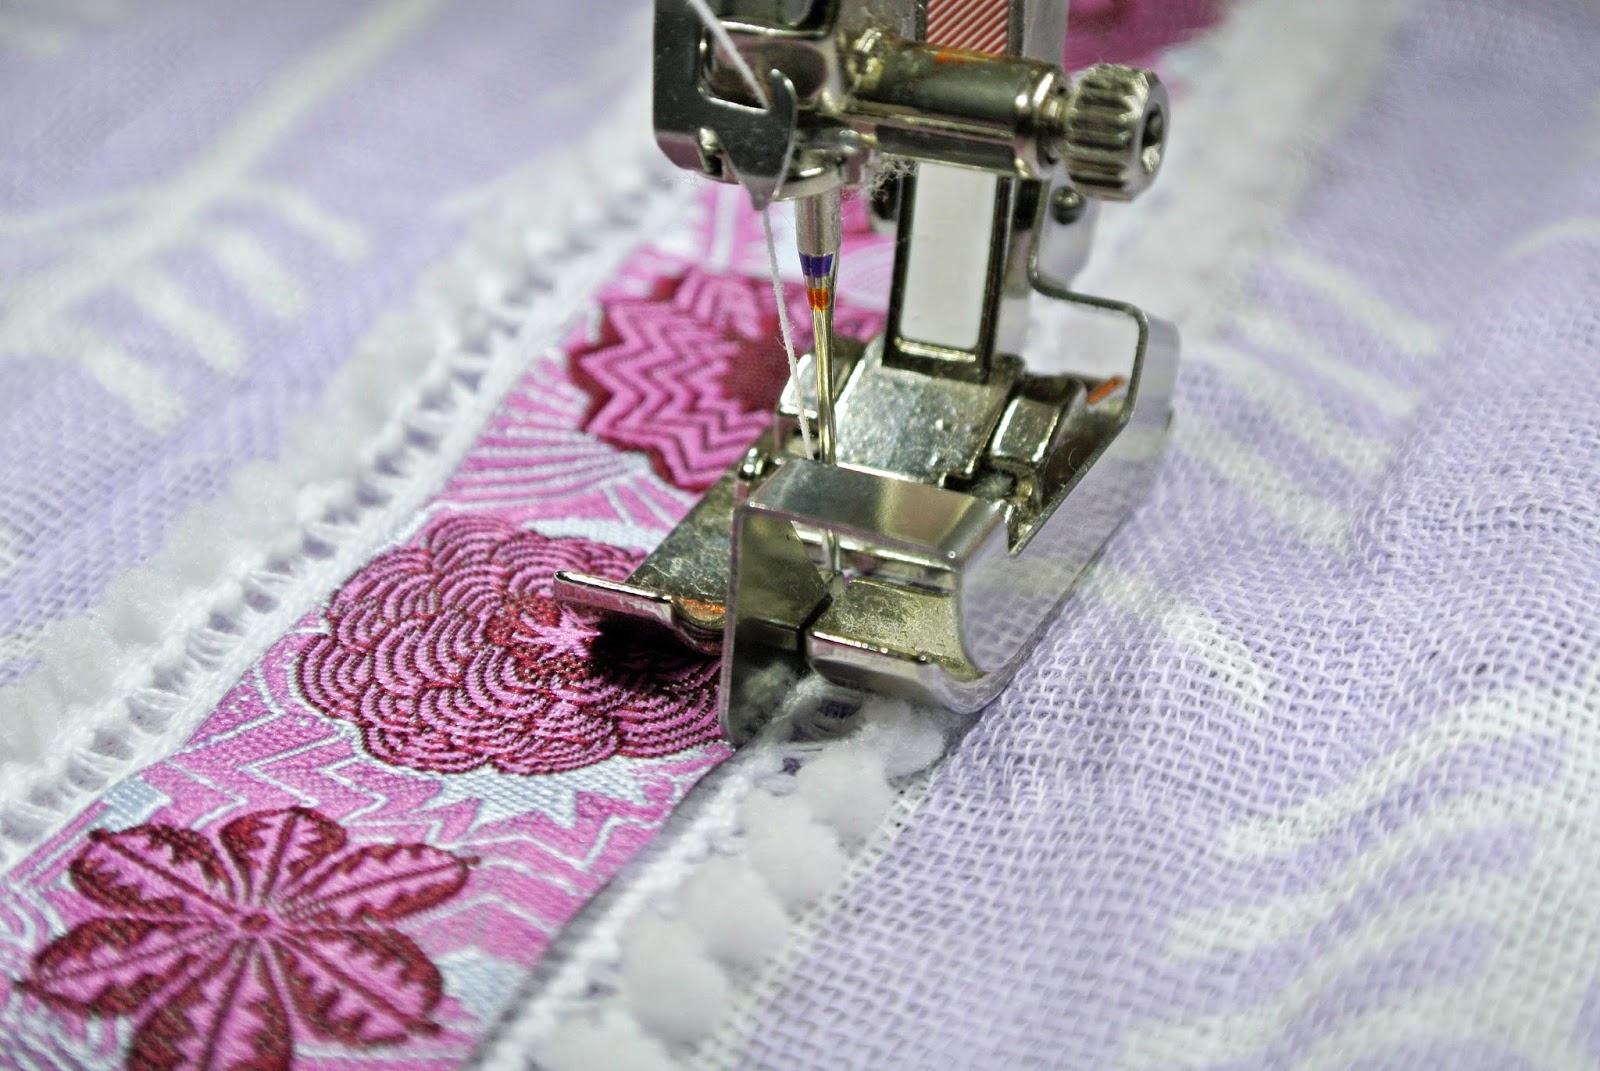
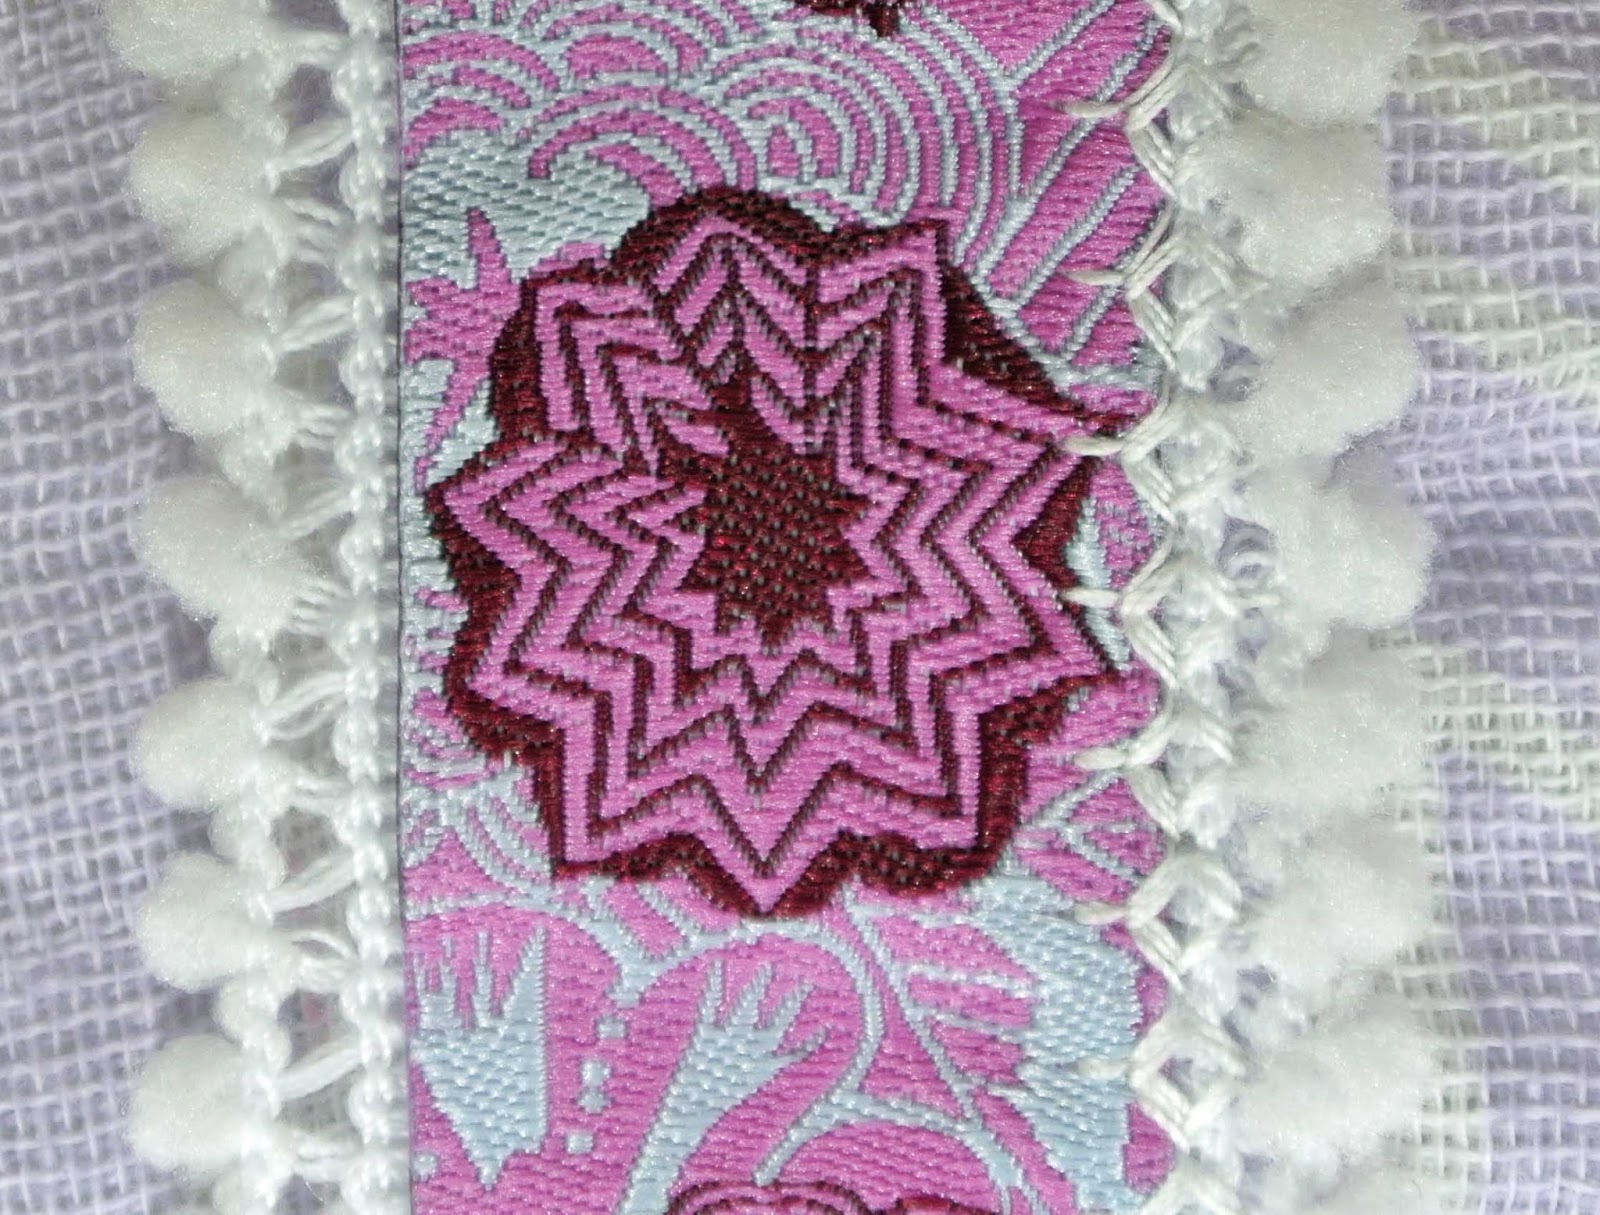
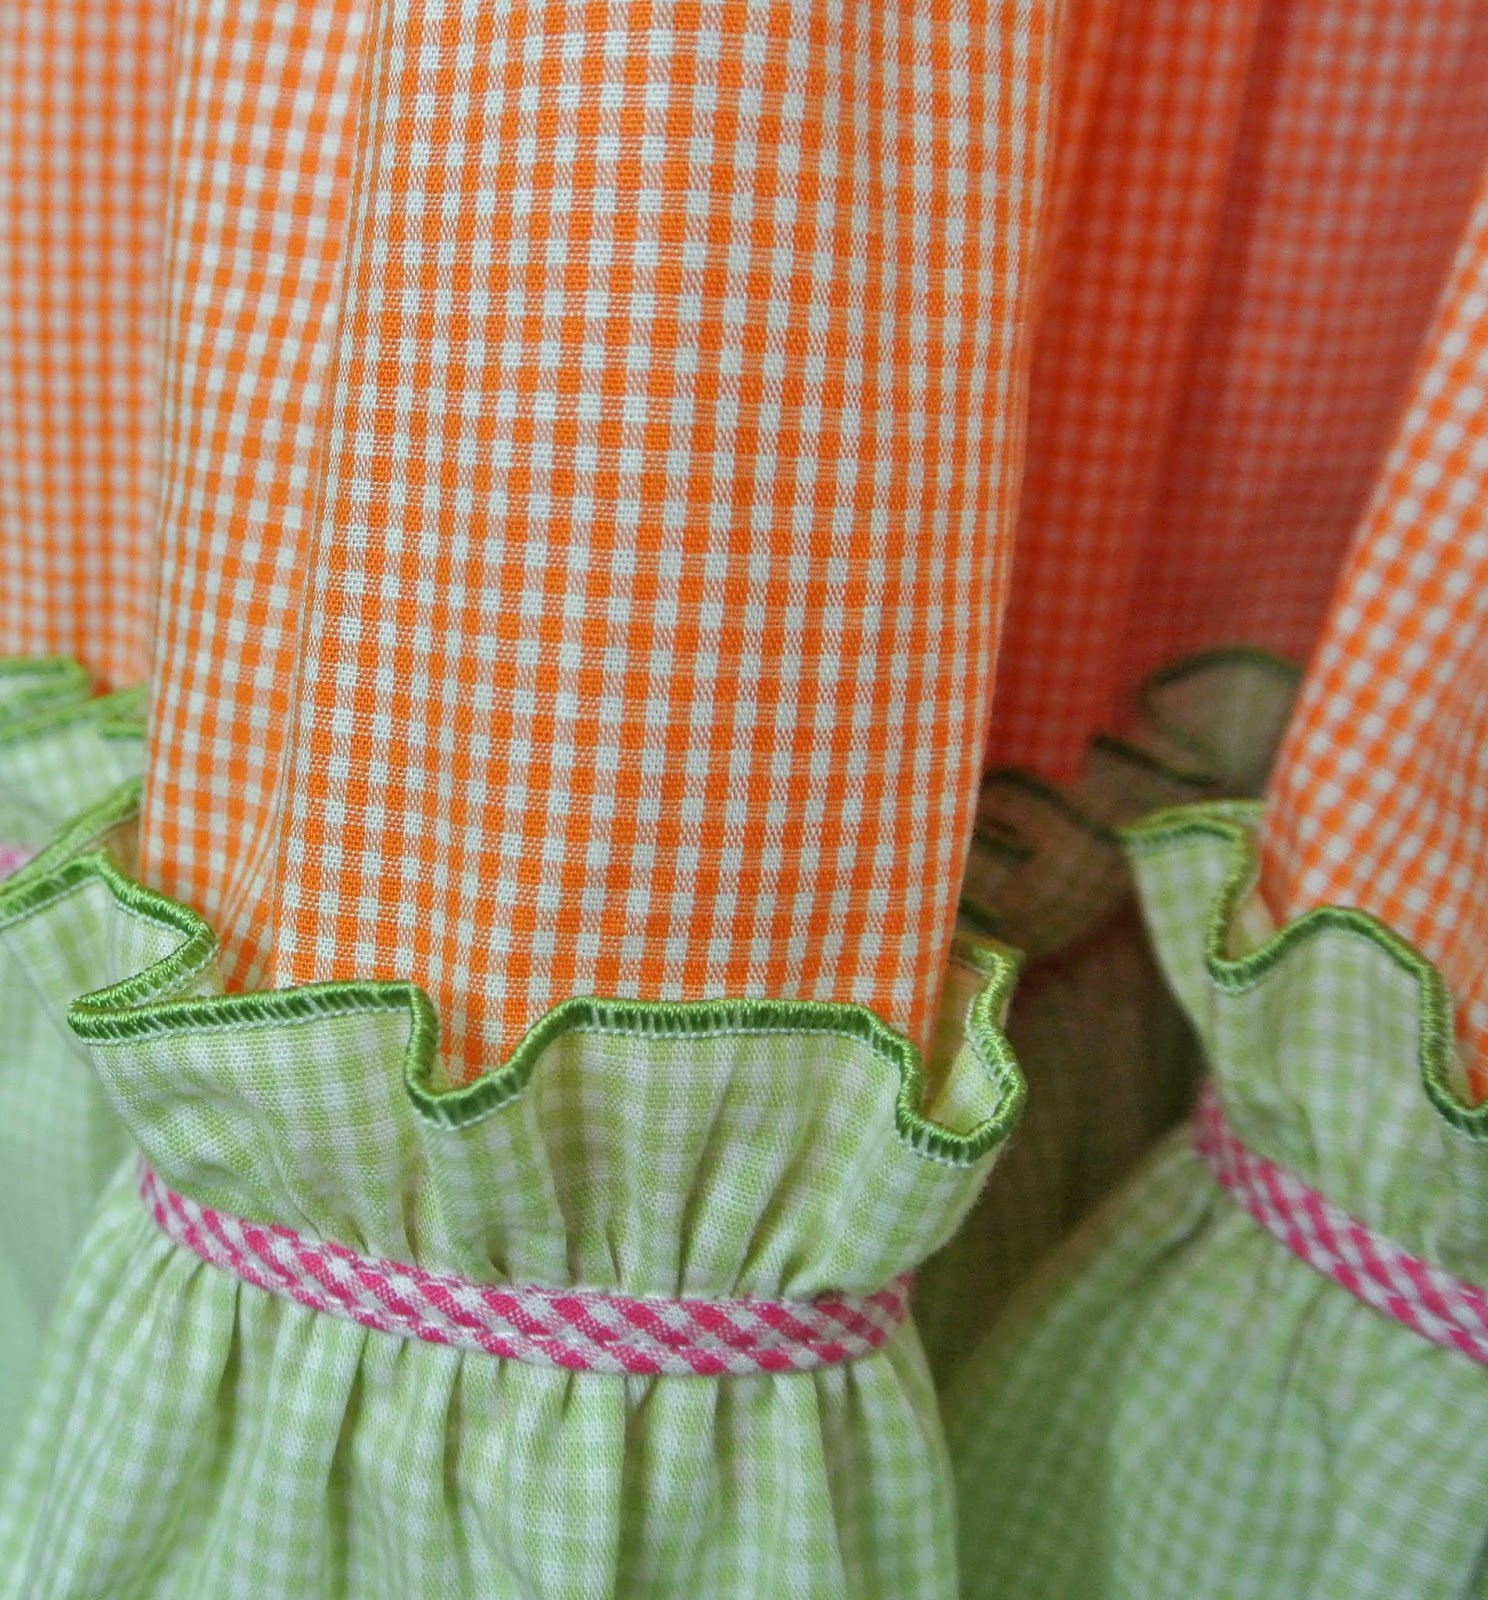
Here’s the bodice detail.
Those are rows and rows of coverstitches using embroidery thread in the needles.
If you don’t have a coverstitch machine, you could achieve a similar effect
on your sewing machine, using a twin needle and embroidery thread.

The back bodice opening has three covered buttons to match the ruffles,
and a big bow.

Covered buttons are so very easy with a covered button kit,
which can be purchased inexpensively at quilt stores or fabric stores.
They add a custom detail to your finished garment.
The ties for that big bow are simply stitched to the top of the side seam.
The techniques we will practice this month are:
Ruffles – using the overlock and/or coverhem
Rolled Hem – using decorative embroidery threads
Topstitching – with the coverhem or sewing machine
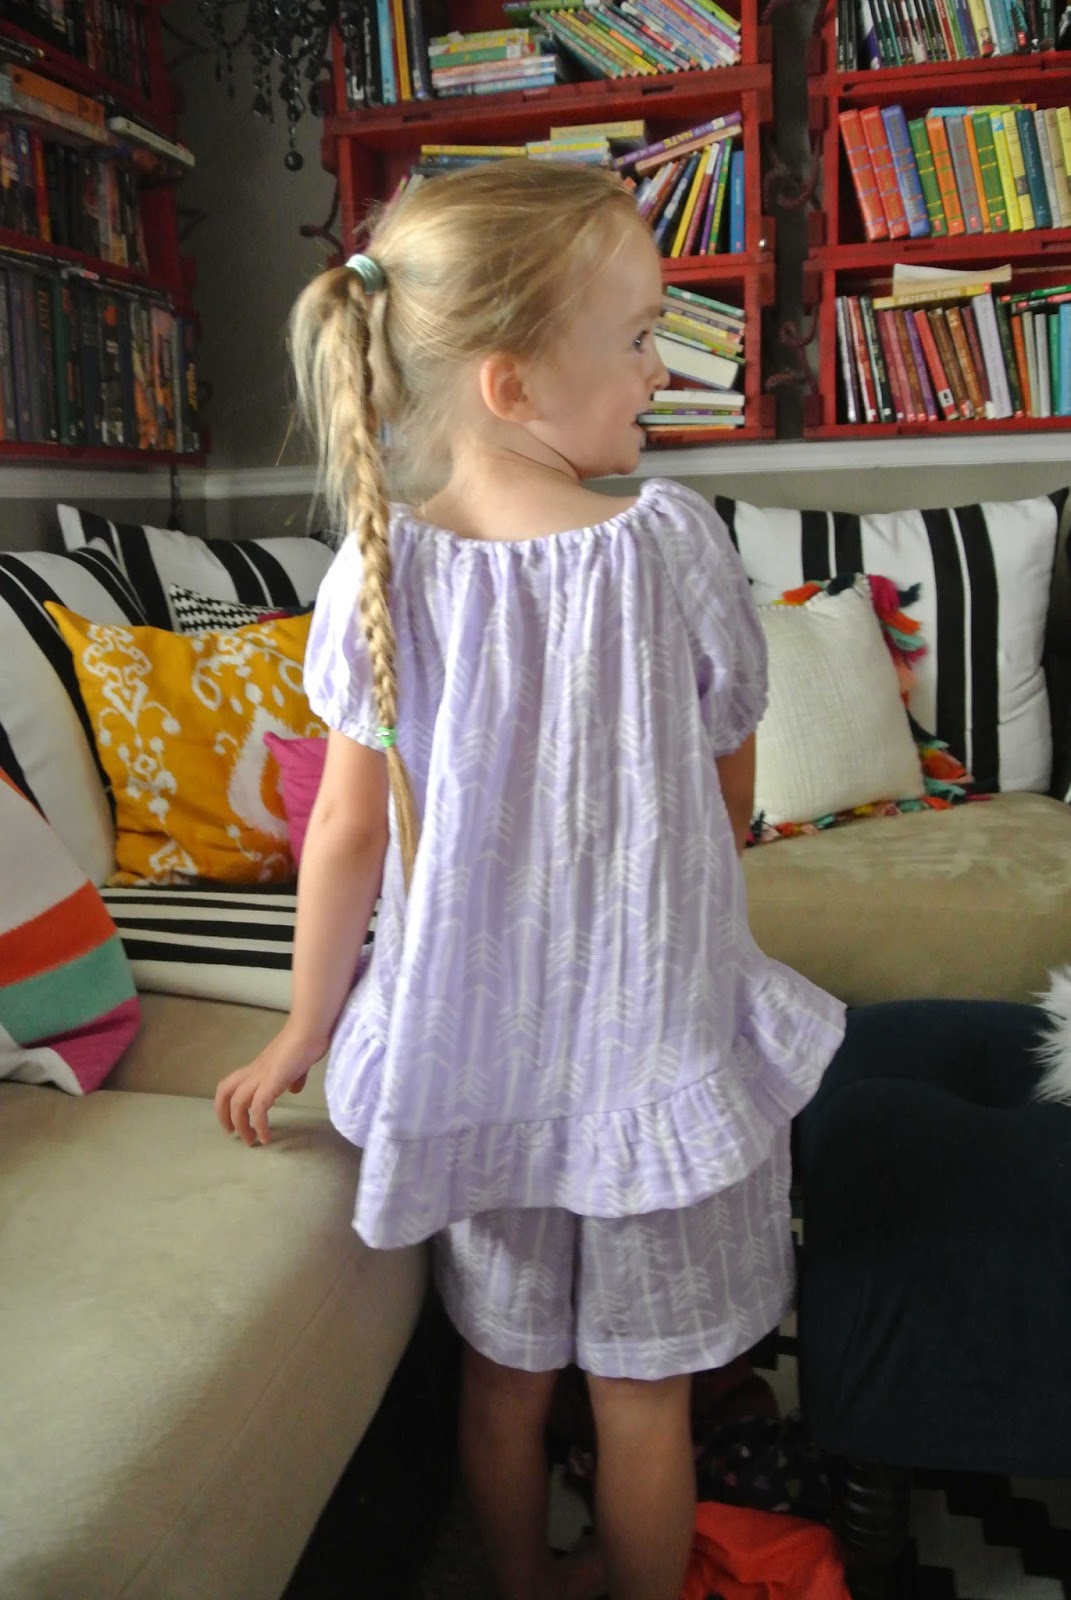
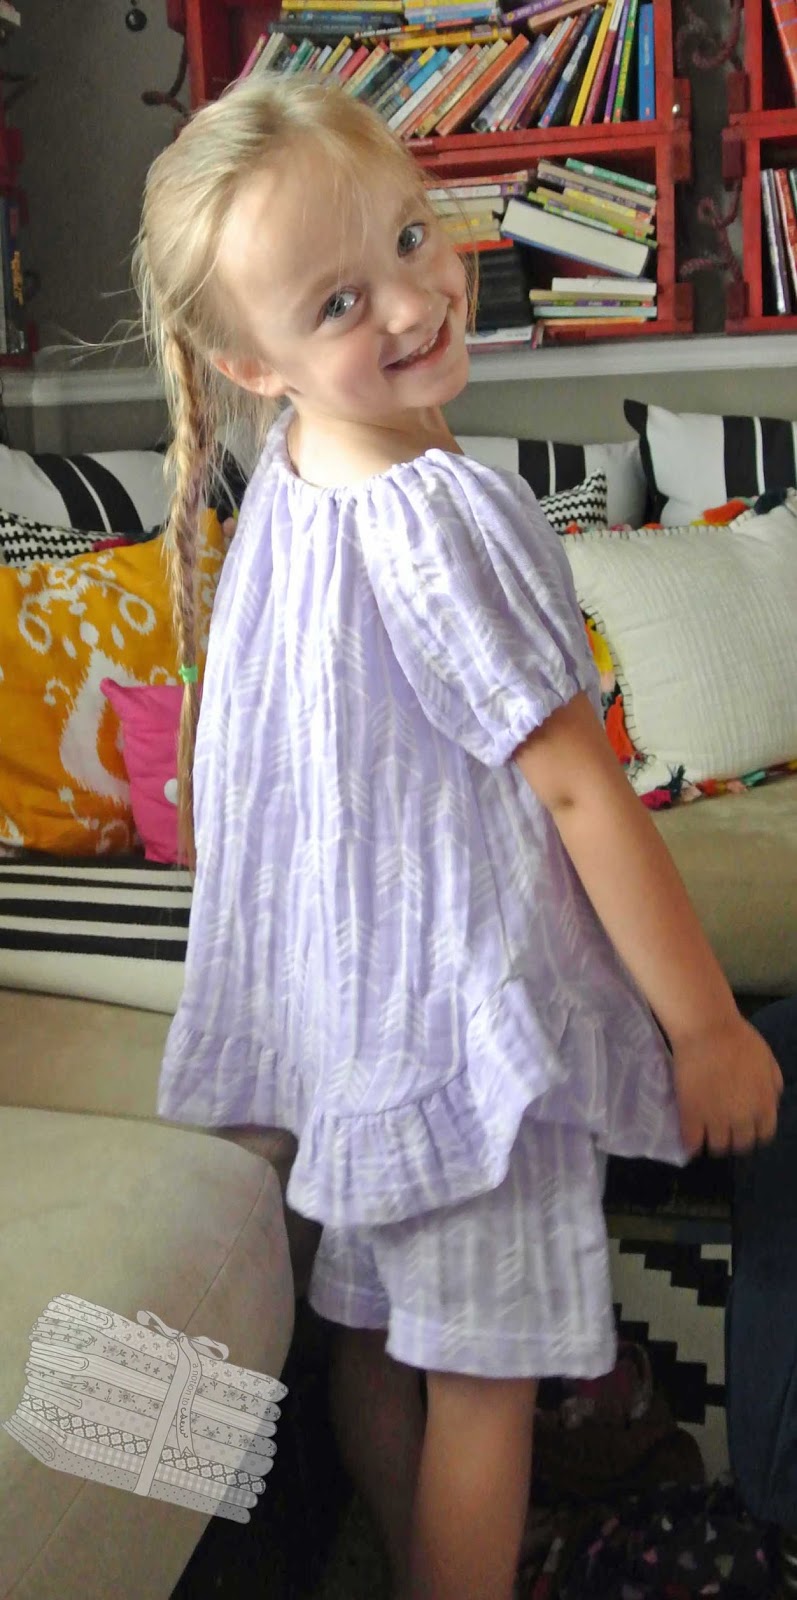
My sweet granddaughter is excitedly waiting to wear her new sundress,
but until we meet on May 13 for serger club,
it will be on display at Nuttall’s in Layton.
Thanks so much for stopping by today.

Sewing for Self

Hello sewing friends!
Here it is December 24 – Christmas is fast approaching!!!
Sometimes, I feel selfish sewing for myself when it is a season of giving to others.
But I know that’s silly!!!
Have you ever given a gift from the heart to a friend or loved one,
only to find out they never used your gift?
I know from Whom my talent comes (James 1:17),
and to show my appreciation
I decided to do some sewing for self this season:
1.  A spring dress
2.  Pajama pants
3.  A bed runner

1.  Summer Jazz Dress pattern by Snapdragon Studios
I’m sorry for not modeling this one, but baby it’s COLD outside!
Most likely March will be the month this one gets to emerge from my closet.
I chose a lovely, hand-dyed batik fabric for this version.
It is soft, lightweight, and flowing.  Love that.
I plan to wear it with navy leggings in the spring,
and I’ll wear it with ‘naked’ legs in the summer along with sandals.
C’mon summer!!!

The pattern is pretty straight forward.
The bodice is a separate pattern piece from the skirt,
and a casing is added to the inside front seam between the bodice and skirt.
Then you insert elastic into that front casing to get the gathering under the bust line.
I used a serger rolled hem to finish off the flutter sleeves.
The fit is nice, I did not make any alterations.
Just stay true to your measurements when choosing your size.
Since the dress is not fitted, a bunch of alterations are not necessary.

The back has a pleat at the empire waist seam line.
I chose to omit the inseam pockets.
Can’t wait to wear this one.

2.  I ordered the ultimate pyjamas kit from Sew Over It in the UK.
The kit included the pattern, fabric, elastic, and ribbon.
Shipping was quick.
I received my order in just 2 1/2 weeks.

I was going to purchase the digital pattern and just download it,
but I also wanted the brushed cotton plaid fabric,
so I figured I might as well just order the kit.
I also purchased the same fabric in the navy/green color.
I’ll use the green fabric to stitch another pair in January.
Can I just tell you – that fabric is delicious!
So glad I purchased two color ways.

Pajama bottoms are so super simple to sew; and this pattern is no different.
I appreciate the added detail of the ribbon in addition to the elastic waist.
The elastic is inserted as usual for an elastic waistband,
but buttonholes are added to the waistband to accommodate the ribbon.
I left the elastic length a little generous – just enough length that the
pajamas sit at my waist without falling down – but then I snug them up with the ribbon.
Great option.

 3.  The Thyme For Friends bed runner was another kit purchase.  This one was from Shabby Fabrics.
My guest room is decorated in lavender and green colors, so this was the perfect addition.
The log cabin blocks went together very quickly.

I used my Block Rockit to quilt the bed runner.  I’m quite pleased with how it turned out.
Merry Christmas Eve and thank you so much for visiting today.

Kwik Sew K213 Children’s Pajamas and How to Add Trim

Hi Sewing Friends!
If you are doing some pajama sewing for some littles in your life,
I am pleased to recommend this pattern – Kwik Sew Ellie Mae Designs K213
The pattern features a top w/short sleeves, ribbon & lace trim, 
and a casing with elastic at the neck and sleeves,
and pull-on pants with elastic in waist casing
There is also a gown and matching doll pajamas
I made the top and pull-on pants (view A and C) in size S(6),
but I made the pants into shorts
I chose double gauze fabric for this summer weight version
The sizing runs pretty much with RTW
Little Miss Model wears a size 6-7 in RTW
and the only alteration I made was to cut the waist elastic 2″
smaller than what the pattern called for
Here’s the front ribbon detail
The components of my trim are a length of Anna Maria Horner ribbon
flanked on either side by some tiny baby pompom trim
Here’s a short walk through of an easy way to stitch trim together
and apply it to a project:
1.  Use wash away wonder tape,
      it is sticky on both sides
2.  Stick it to the backside of your focal trim piece
(in my case, the Anna Maria Horner ribbon)
3.  Peel off the protective paper and stick the secondary trim to your focal trim
4.  Now add another strip of Wonder Tape to the back side of the entire trim piece
and stick it to the right side of your project
(the Wonder Tape was actually wider than my little pompom trim
so I didn’t have to stick more tape on the back side of my trim piece)
Now it stays in place for you while you stitch it down
Ordinarily, I would add a piece of stabilizer to the back of my project,
but this double gauze didn’t need it, it stayed nice and flat as I stitched
5.  Okay, attach your edge stitch foot (for Bernina it is #10) to your machine,
line up the guide between two pieces of trim,

and select a stitch that catches the left and right sides (on my Bernina, I used stitch #723)
and sew that beautiful trim to your project
Be sure to make a sample first so you know what stitch settings work the best
I narrowed my stitch to 7 mm

Here’s a close up of the completed right side
The left has not been stitched yet
So there ya’ go
Have fun stitching for your littles
and/or adding decorative trims to your projects
These little details add one-of-a-kind personal touches to your sewing
Enjoy!
Thanks so much for visiting today.