The Miranda Tote

The Miranda Tote is a quick, satisfying sew. The instructions are well written, and as a bonus, Sallie Tomato has a sewing tutorial on You Tube. So if you are fairly new to bag making, this might be a good option for you.

The finished dimensions are 11.5″ wide x 12″ high x 5″ deep. That’s a good size tote! Here I have it loaded up with some orders from my shop. Time to head to the post office!

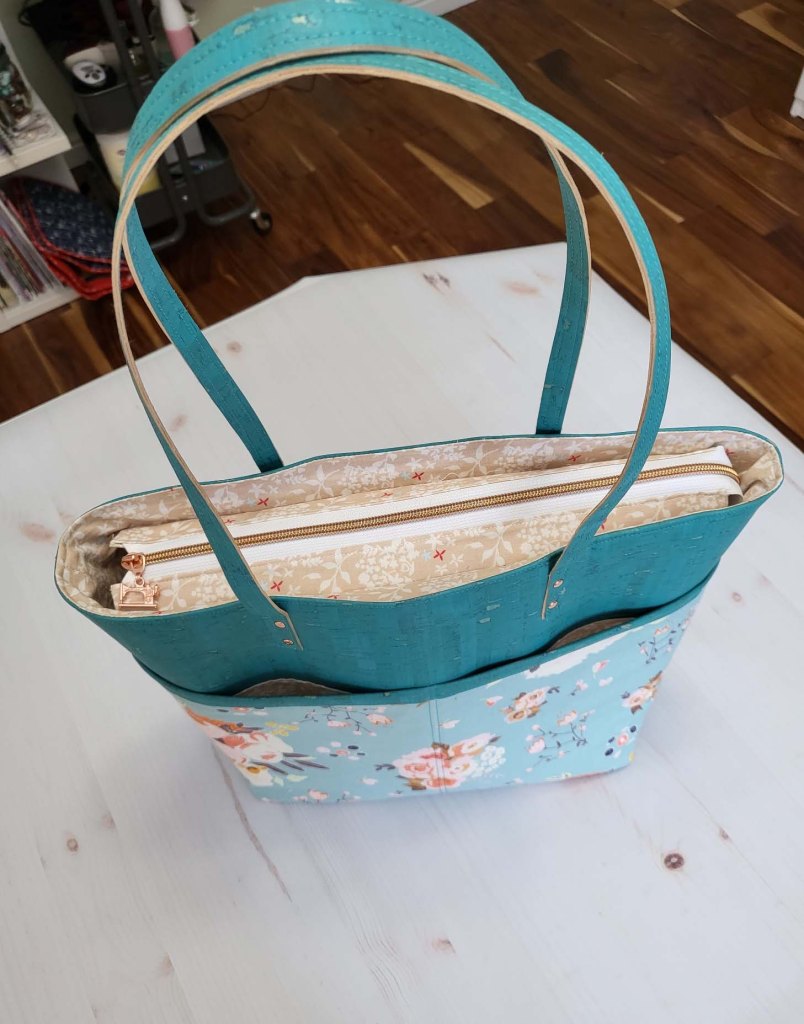
The bag features a recessed zipper top closure to keep your contents secure. I used a Sallie Tomato zipper by the yard in white with rose gold zipper teeth.

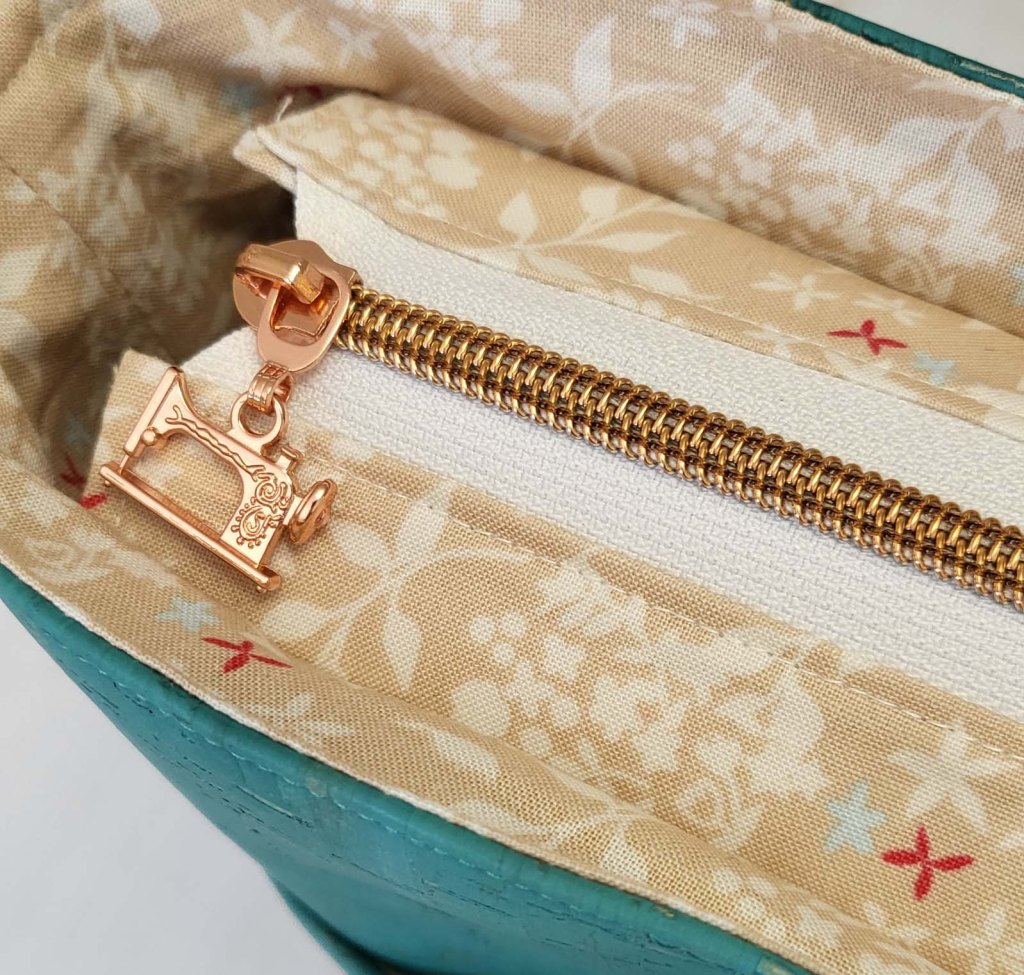
I added a rose gold sewing machine zipper pull for a cute touch.

And a copper zipper end gives a polished finish to the zipper as well as stability when pulling the zipper closed.

After inserting the lining and turning the bag right side out, I added a plexiglass insert into the bottom of the bag between the lining and the outer bag. This gives lots of stability when the bag is full. No saggy bottom!!!

I simply purchase a small piece of plexiglass at my local Home Depot and my husband uses his table saw to cut it to the size I need. He then rounds the corners with his sander so they don’t poke through the fabric in my bag. I insert it through the opening that I left in the lining, then I hand stitch the lining closed.

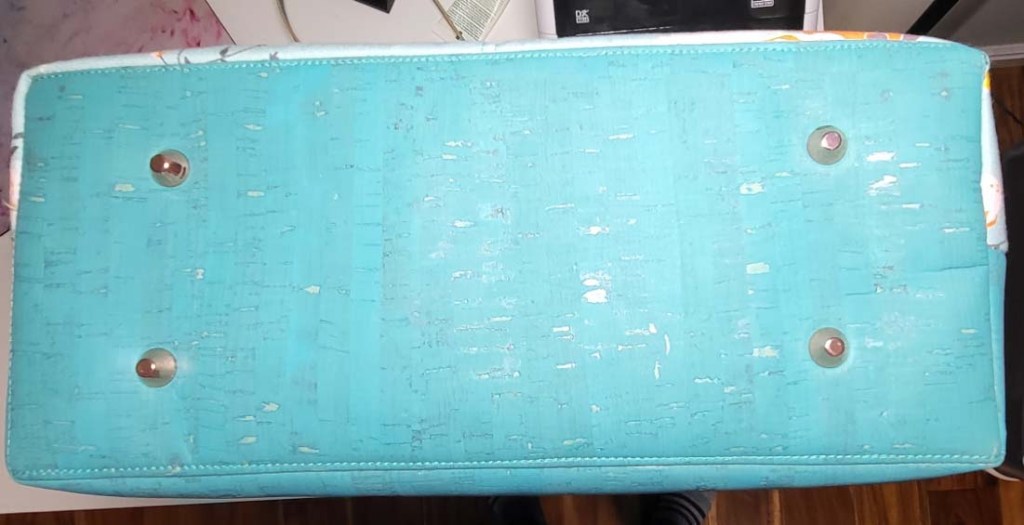
There are four rose gold, bucket style bag feet on the bottom of my bag. I used a small piece of foam stabilizer on the wrong side of the cork. Once I inserted the prongs of the bag feet through the cork and foam, I added some Gutermann Creativ glue to the prongs and foam for extra security.

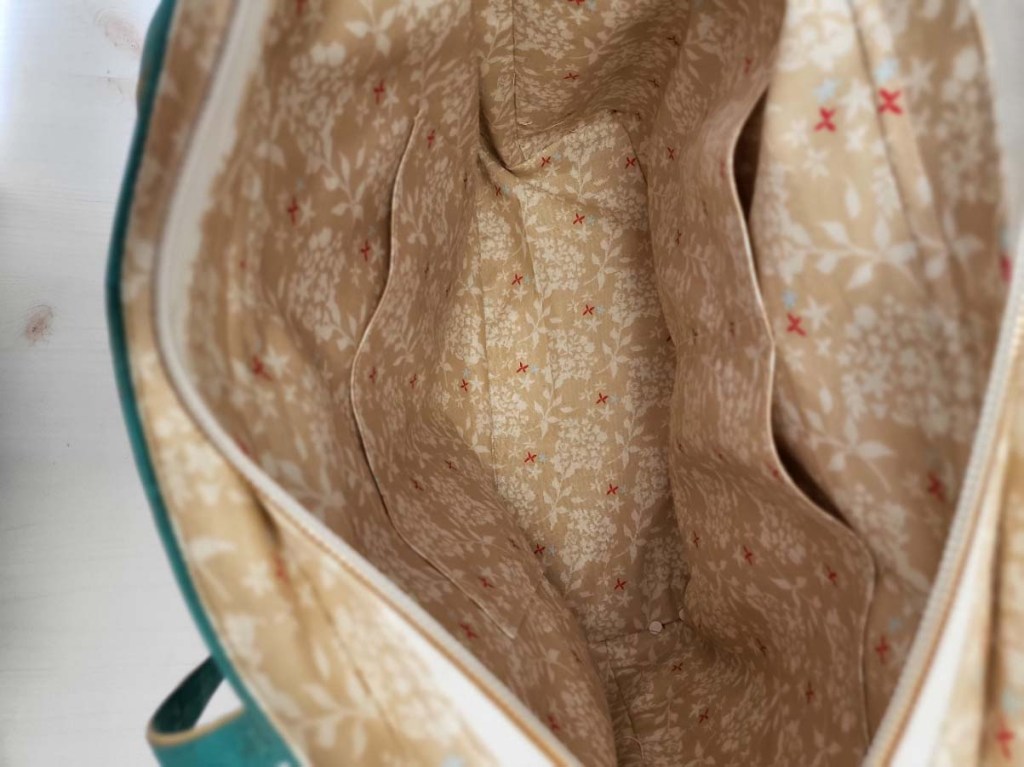
I sewed up the bag just as the instructions indicated with a single pocket on one side of the lining and a double pocket on the opposite side of the lining. One thing I would change in my next bag, is that I would add SF101 (or similar) interfacing to the inner pockets. The pattern does not call for interfacing on these pattern pieces (piece M and piece N), but I would highly recommend interfacing them. Without interfacing, the pockets are somewhat ‘floopy’.

The outside front of the bag has two large slip pockets. Those pockets don’t seem to need interfacing. They keep their shape just fine. I used Soft and Stable from byAnnie to give structure to the body of the bag. I used rose gold rivets to give added security to the stitched on handles. The handles are only 1/2″ wide. I find that size handle to be just a bit narrow for this size bag. My next one will have about 3/4″ to 7/8″ wide handles.

I used turquoise cork for my main fabric; quilting cotton from Minki Kim’s Hidden Cottage line for the outer pockets; and quilting cotton from Minki Kim’s Someday line for the lining. My Baby Lock Destiny II does not like to sew through cork, foam, and cotton, so I used my old Viking Mega Quilter to stitch my bag together.

All in all, this is a terrific tote. I highly recommend this pattern for confident beginner sewers to experienced sewers.

Thank you for spending some of your day with me today, sewing friends. Please leave me a hello in the comment section.

New Look #6683 – Sweater Dress

Baby it’s cold outside! Time for sweater dresses. This is one of the new Fall 2020 releases from New Look patterns. It features dropped shoulders and ribbed cuffs on the sleeves. There are two views from which to choose: View A – short stand up neck and patch pockets OR View B – cowl neck and side seam pockets. I chose to sew View A.

The neckline on my dress doesn’t stand up as straight as the pattern photo shows, but that is because my fabric has a substantial drape. If I were to sew this again with this same fabric, I would interface the neck piece so it would have more stability. That said, it still looks good and does not affect the wearability of the dress.

The neckline from View A allows for bold jewelry or scarves to be added without interfering with your accessories:

I chose the size 16, but I wish I would have gone with the 14. My dress fits great in the hips, but it is big in the bust/armhole area. If I sew another dress from this pattern, I will go down a size in the shoulder and bust area and just grade up a size toward the hips. I will also add bust darts, which would give the upper body some nice shaping.

The fabric is a boucle sweater knit from Stylemaker Fabrics (from last season).

All in all, I consider this a successful make and I plan to wear it throughout the winter.

If you are interested, I posted a video on my YT channel:

I would love to hear your thoughts on sewing with sweater knits. Please leave a comment.

Thank you for visiting my blog.

Silhouette Patterns #120: Patty’s Princess Seam Top

Here’s my test version of this princess seam top. Overall I’m quite pleased with the outcome. The color washes me out a bit, but that has nothing to do with the pattern and everything to do with the fabric. 🙂 BTW, the fabric is a medium weight, stable knit from Joann Fabrics.

I sewed a size 3, and the pattern calls for 2 yards of 60″ wide fabric. This is how I laid out my pieces. I did not measure the length of fabric, but I know it did not use 2 yards. I’m guessing it was about 1 1/3 yards of fabric.

I always use my quilting ruler to measure from the straight of grain pattern line to the fold of my fabric so I don’t get any garments that hand with a skewed drape.

These odd little marks are on the side back pattern piece along the princess seam edge. I’m not sure for what they are to be used. There is no indication on the instruction sheet and this is the only pattern piece on which they showed up. I just ignored them!

The sleeve pattern has a dart, which was an interesting addition that I’ve not come across until now. Here is what it looks like when finished:

I discuss the arm dart more in my YT video. There is a link at the end of this post.

The neckband is attached in a continuous loop, then the “V” is made by sewing a small dart into the band. Here is a look at the inside of the neckband where that dart is sewn:

When you sew the dart, be careful to sew ONLY the neckband being careful to not catch any of the garment under neath your presser foot (do not go past the seam line or you will have a pucker at the point of the “V” – trust me, I speak from experience.

Thread sinks into knit fabric and it is a real challenge to pick out stitches without making a hole in the fabric (see example above) *sigh*.

This is an easy top to sew and I like the little bell sleeve.

Here is my YT video:

Thank you for spending a few minutes of your day with me. 💜

If you have questions or comments, please leave them in the comment section below. I really enjoy feedback from my readers. Until next time, happy sewing!!!