Kitchen Valance

It’s Fall and it’s time for a change.  Here is a simple valance I made for my kitchen window.  Such a small change but such a significant impact.  Sometimes simple is good!

I used some fabric from my stash.  It is actually a Christmas print, but IMO can be used year round.  It is “At Home for the Holidays” by Heather Mulder for Henry Glass Fabrics.  The black print is a great accent to my black appliances, but I needed a pop of color so I added extra large red ric rac trim.  I purchased both from my local quilt store about a year ago.

Now on to something not so simple.  I must finish two skirts – one for me and one for my guest bed!  Have a terrificly beautiful Fall weekend.  My apple butter is in the canner processing as I edit this post.

Retro-Modern Pillow

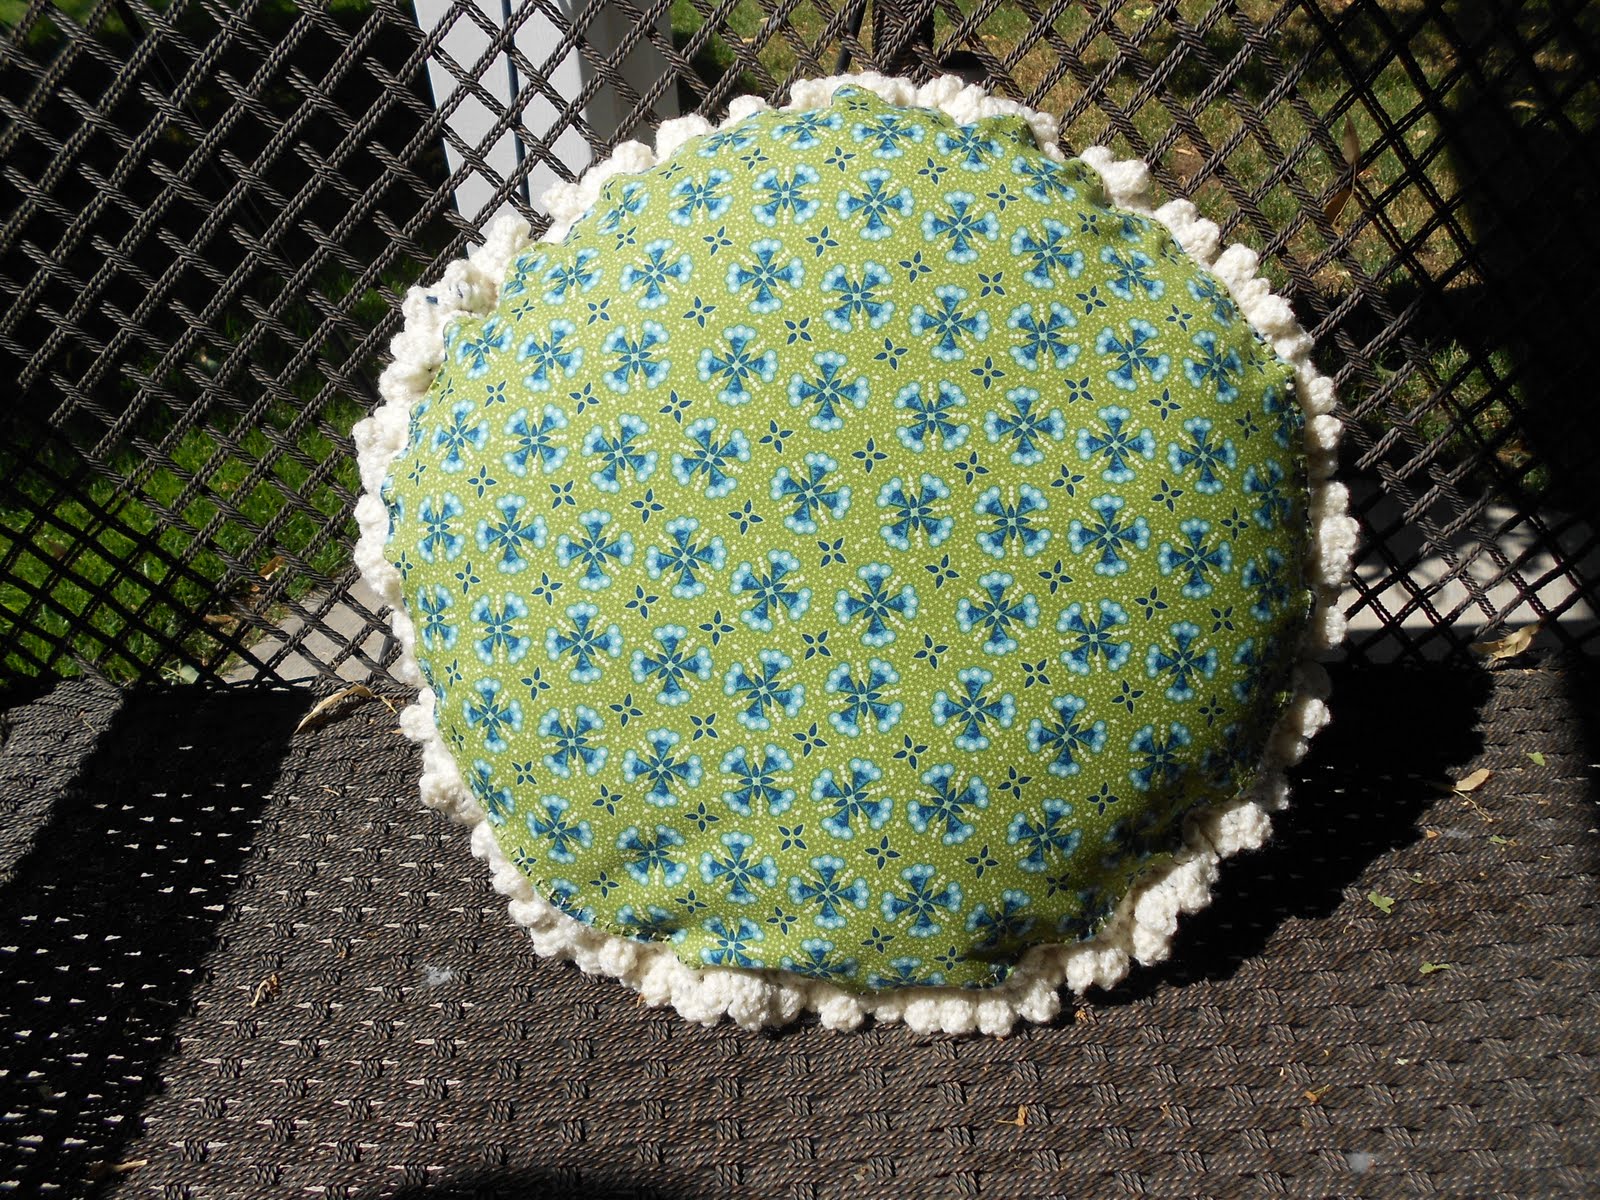
A crocheting camping we will go, a camping we will go . . .  DH and I finally pulled out the RV for our first camping trip this season.  We spent five glorious days and nights in the mountains doing absolutely NOTHING (except for crocheting this terrific retro-inspired pillow).

The pattern is in the Setember/October 2011 issue of Crochet Today magazine.  The pattern includes a square version and a round version.  I chose the round one simply because all my throw pillows are square and I needed to change up the mix a bit.  I used the suggested yarn colors as follows – Red Heart Super Saver #380 Windsor Blue and #313 Aran, but I couldn’t find #406 Med Thyme at my local craft store, so I used #661 Frosty Green.  The pattern calls for a crocheted front and back for a 16″ round purchased pillow form.  Being a sewer, I decided to crochet only the front panel and to use fabric for the opposite side.  I also added a scalloped crochet edge to bring it all together.  I happened to have a piece of quilter’s cotton in my stash that complemented the yarn colors perfectly.  Here’s a shot of the opposite side:

In case wondering minds want to know, here’s how I put the whole thing together. 
1.  I started with my crocheted pillow panel:

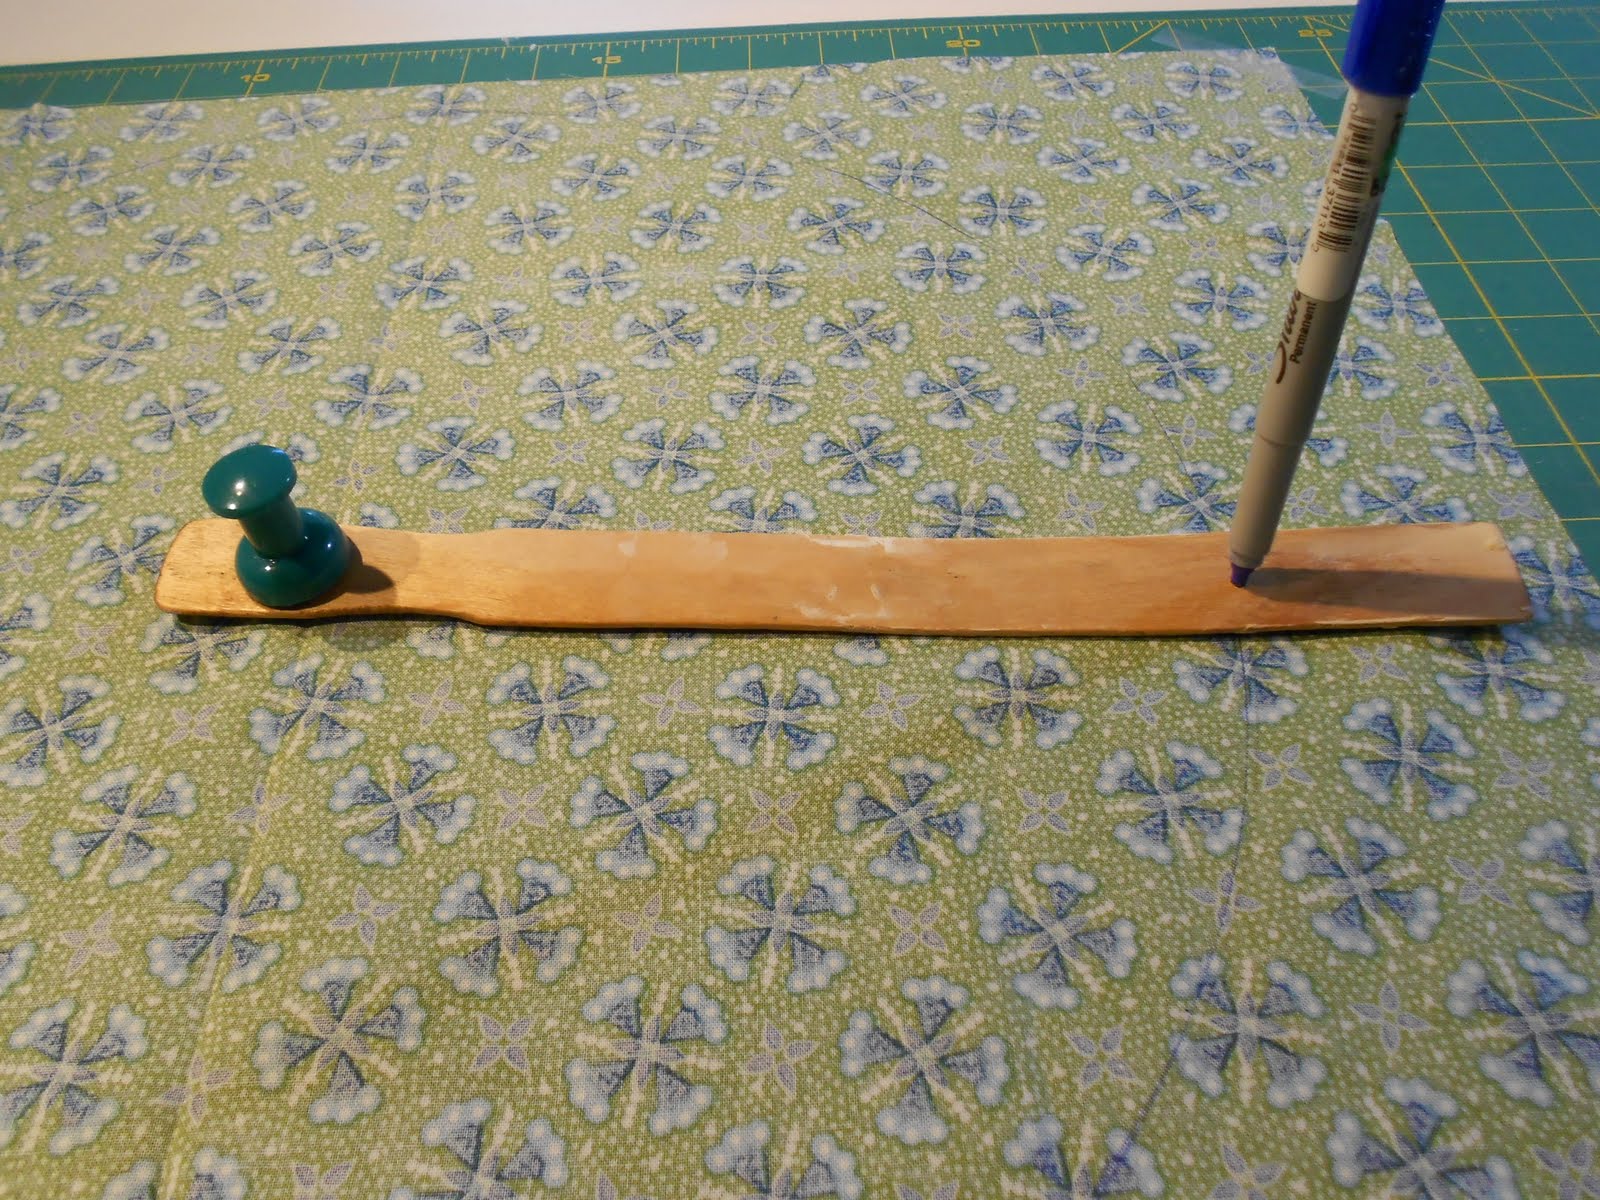
2.  After measuring to make sure it truly was 16″, I cut my cotton fabric to 16 1/2″ using a ruler and Sharpie to mark my circle.

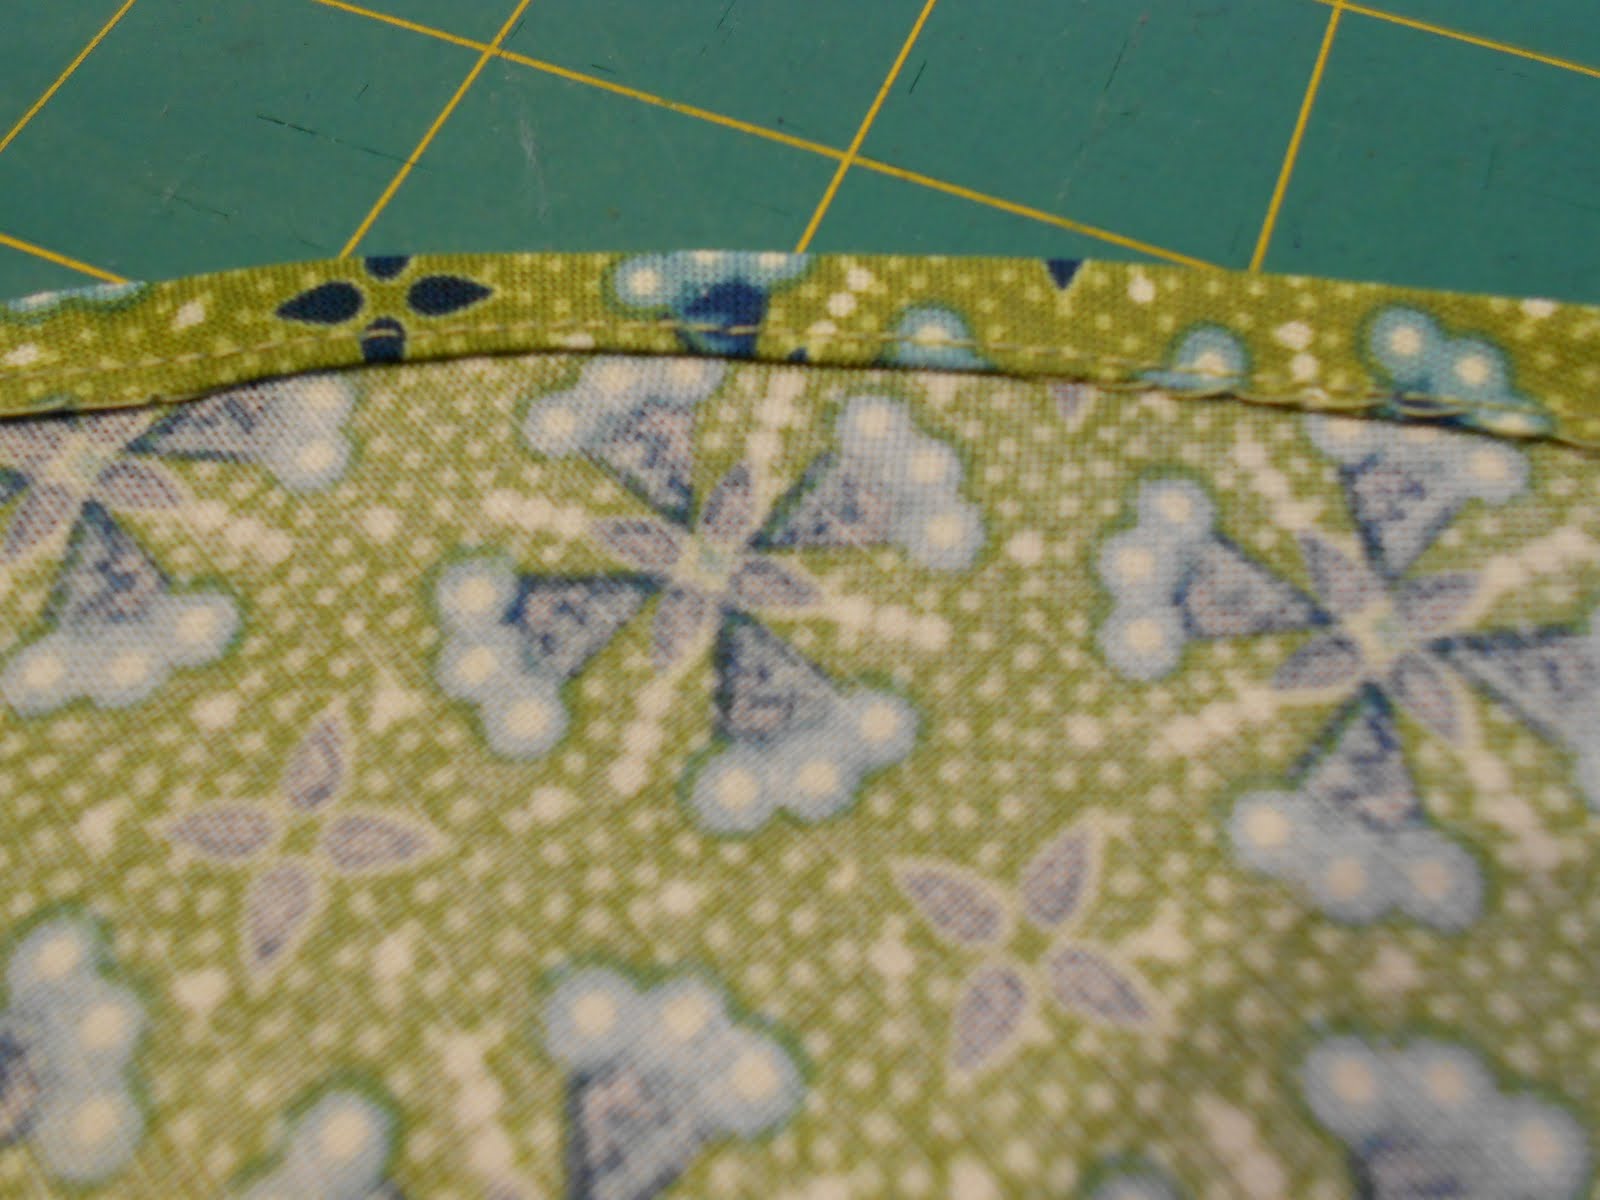
3.  Then I sewed a 1/4″ double fold hem around the circle.  To do this, simply sew a basting stitch 1/4″ from the edge of the fabric like so:

4.  Pull up the bobbin thread and the hem will ‘fold itself over’.  Then simply fold it over on itself again and topstitch.

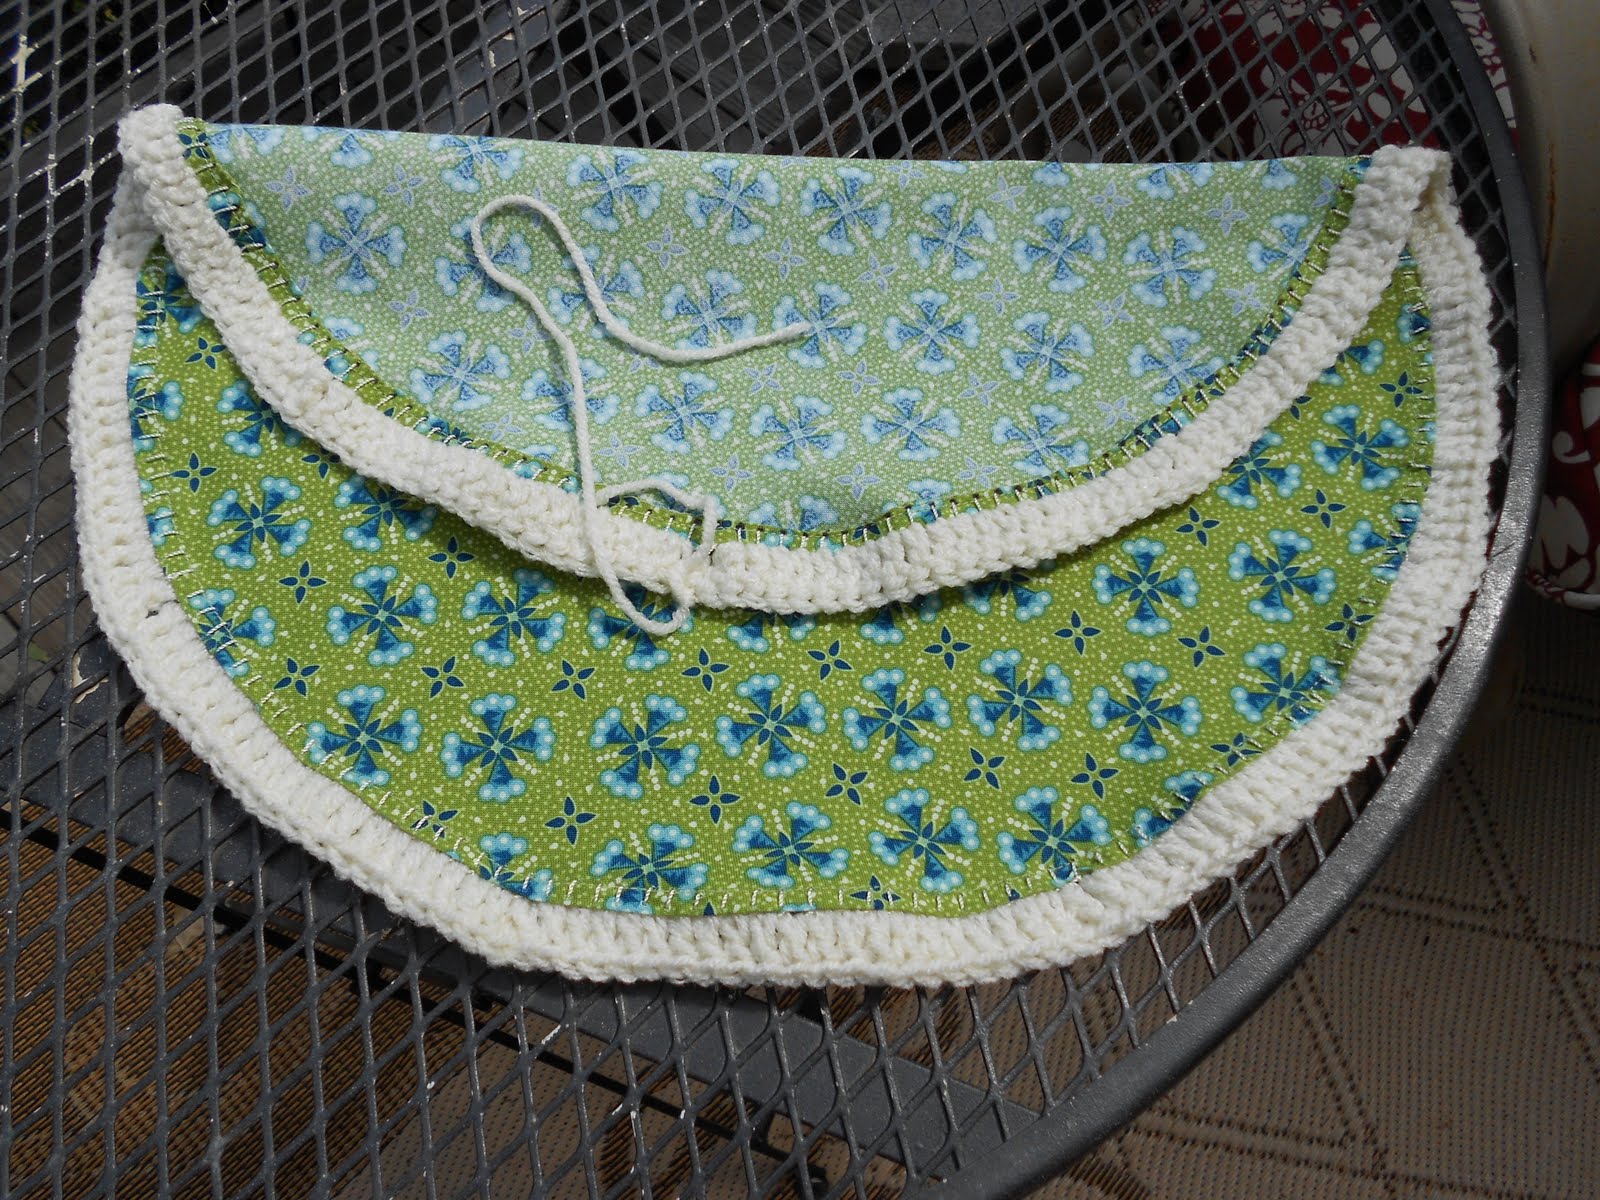
5.  Then, using Omega nylon thread, I hand sewed a blanket stitch around the circumference of the cotton fabric so I would have a foundation on which to crochet a row of double stitches.

6.  Finally, I used a scallop crochet pattern to attach the back to the front.  This was a really fast and easy project and it was a great addition to my square, fabric home dec pillows.

Completed Cardigan – Simplicity 2154

Wow!  Hard to believe it’s been a month since my last post.  It is my goal to post at least once a week, if not more.  Hmmmm, I fell a bit short of that goal in August.  Okay, enough guilt, let’s move on.  It’s a new month, new beginning.  Here’s my completed cardigan that I previewed in my one and only August post (so maybe I’m not past the postless guilt syndrome yet!):

In case it’s not obvious, that’s not me modeling the cardigan.  Until I’ve completed the entire outfit, I chose to simply show it on the headless woman who shares my sewing room studio.  I plan to sew a skirt and blouse to make a complete ensemble.

Here’s  a close up of the buttons and buttonholes. 

Buttonholes are not my favorite closure to sew, but I sucked it up and forged ahead.  Don’t get me wrong, my Bernina sews the most beautiful, perfect buttonholes I’ve ever seen.  It’s the simple act of cutting the slit in the buttonhole that rattles my nerves.  Once the initial cut is made, there’s no turning back – this is not a task for those afraid of commitment!  Four of the six buttonholes were a “clean” cut and I only clipped a few threads on the other two buttonholes when I cut the slit in them.  That’s success in my book.  I simply went back and sewed a new zig zag over the clipped threads.  This is a picture of one of the buttonholes that I “repaired”:

I’ve not fully commited yet to which pattern I will use for the complementary skirt and blouse, so until then, I’ve gone a whole different direction.  I have an almost-completed home dec project that I will share with you later this week.  Have a terrific Labor Day.