Leggings – A Wardrobe Staple

Hello Sewing Friends!
I’m a true legging lover
they are comfortable and
they can be worn in numerous ways
Dress them up with a stylish topper and heels
wear them under a dress or skirt
for added warmth in the winter with boots
for a simple pulled-together look in the summer with sandals
You can make them full length,
cropped,
or bermuda length

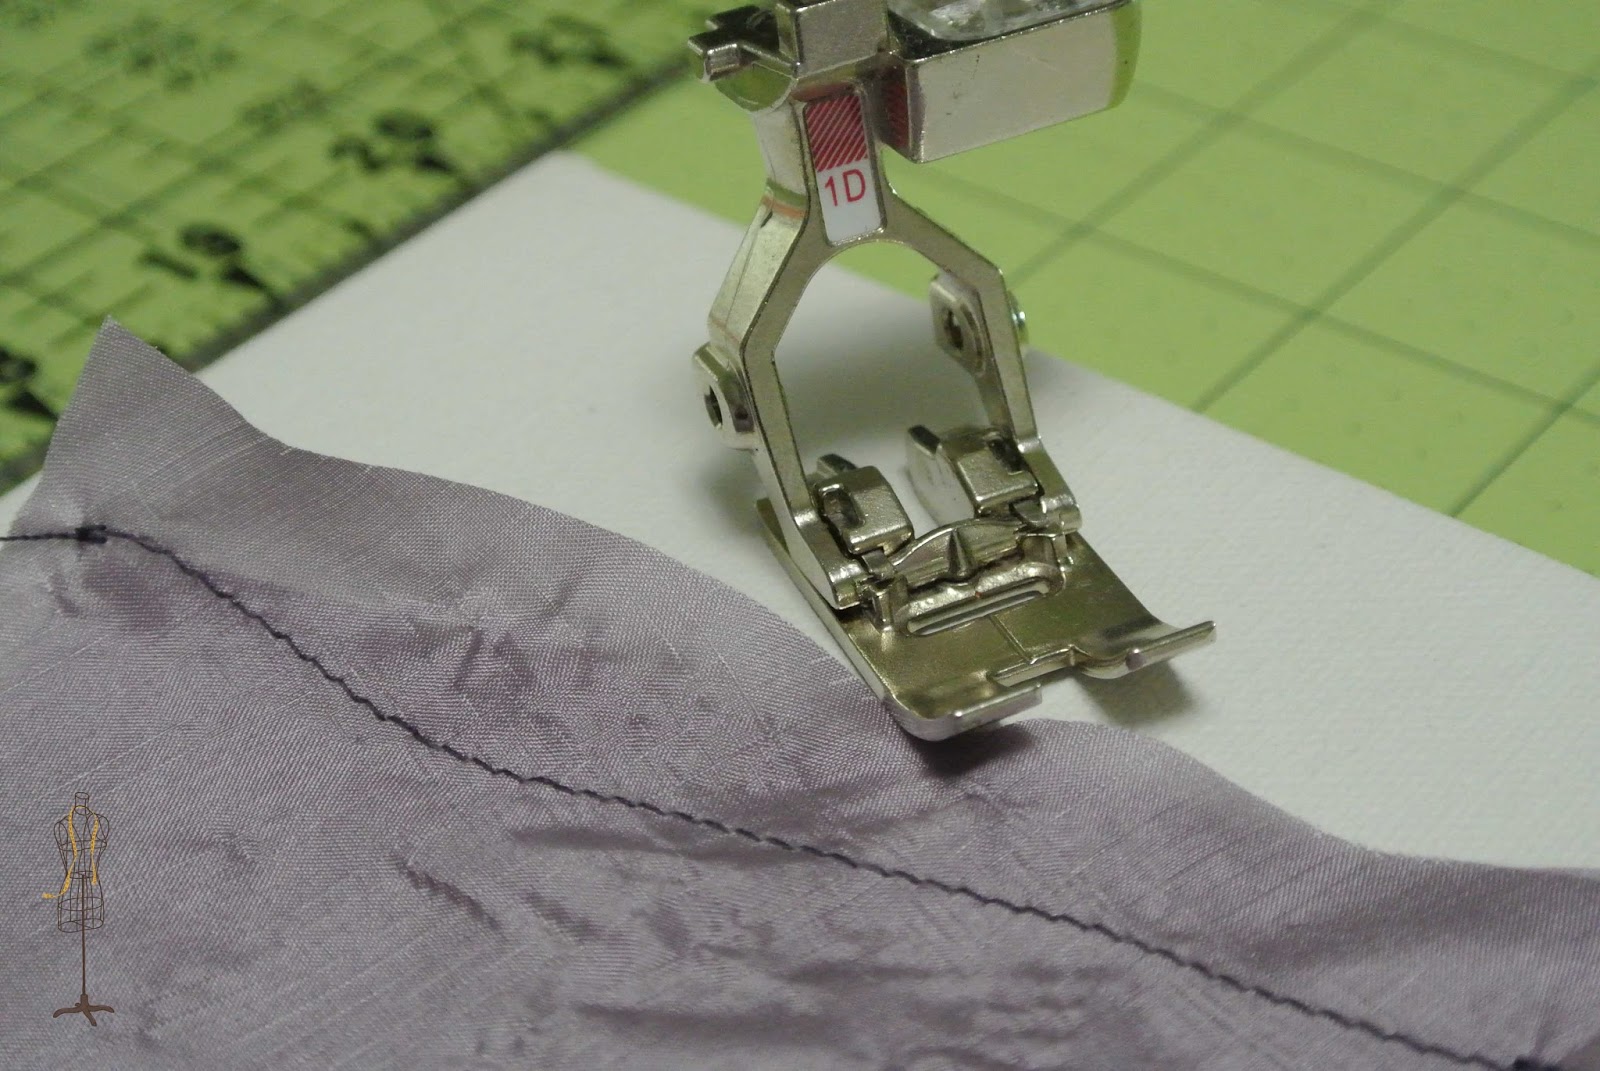
Use a ball point double needle or a serger
to achieve the ready-to-wear hem look
and use a ball point (stretch) needle for your seams so they don’t ‘pop’
no extra equipment required
I’m teaching a legging class on March 2 from 1-5 p.m.
at Nuttall’s in Layton
if you are local, won’t you come join us?
You will go home with a new pair of custom sewn leggings

Pattern:  Kwik Sew 3636
Then sit back, relax, and enjoy the sense of accomplishment
from such a short investment of time and effort
Thank you for stopping in to say hello.

How to Easily Sew China Silk (and other slippery fabrics)

I’m sewing another Painted Portrait pattern.
This time it is a blouse instead of a dress.
The bodice lining is China silk.
I love to use China silk for lining.
I hate to fiddle with slick, misbehaving fabric.
Above are some of my favorite tools to use with such fabric.
First, a tip from Sarai Mitnick of Colette Patterns:
lightly spray the fabric with Sullivan’s Fabric Stabilizer
(be certain to test it on a scrap first).
Then, I like to lay out the fabric and pattern pieces on a cutting mat.
Finally, I cut the fabric and pattern using a rotary cutter instead of sheers.
Works like a charm!
After my pattern pieces were perfectly cut,
I began sewing the lining together at the shoulders.
Ugh!  Look at the difference between the left and right shoulder seams.
I sewed the first seam with my general purpose presser foot
(Bernina Foot #1, Reverse Pattern Foot)
The fabric got hung up under the presser foot and the seam slipped.
What a mess!
I switched to my non-stick zig zag foot
(Bernina Foot #52)
Wow!!!
What a difference.
Look at how smooth and lined up that seam stayed.
I’ve now added the non-stick presser foot to my
group of favorite tools to use with slippery fabrics.
Are you shy about sewing with specialty fabrics?
Do you have any tips to share when sewing with these fabrics?
Please share with the rest of us.
I love to learn new tips and ideas.
Have a smooth sewing week, my friends.

Quick and Easy Child-size Wrap Skirt and Coordinating T-shirt

 Hey friends!
If you’re doing any sewing for pint-size people,
you might want to give this little wrap skirt a look.
The pattern company is AJ’s Boutique.
This one is pattern No. 5, Wrap Skirt in children’s sizes 4-5-6-7-8.
For my just-turned 5-year-old granddaughter, I sewed up a size 6.
It is a bit large, but I’m confident she’ll be wearing it in the near future.
The only closure on this one is a self-tie made from the waistband.
I used a solid red fabric for the back side of the waistband/tie
and a coordinating floral print for the front side.
 
Sewing time is approximately two hours start to finish.
That includes making your own bias trim such as the red polka dot that I made.
The bias went on quickly using my Bernina bias binder attachment.
The skirt instructions include just a few basic steps:
sew two skirt pieces together (one seam.total.that’s all.);
attach bias binding (can use purchased, don’t have to make your own);
sew inside and outside waistband pieces together and turn right side out;
attach waistband to top of skirt;
Done!!!
This is a great beginner project as well as an
instant gratification for experienced sewists project.
Have fun.