DIY Hoop Art

When I was at #craftsouth in September,
we stitched up some moth designs.
On the left is an embroidery design by Heather Ross,
and on the right is a cross stitch design my Anna Maria Horner.
Rather than framing these two beauties,
I chose to hoop them.
That way I have options on how to display my stitchery.
They can be hung on the wall with nails, they can hang on hooks,
or . . .
they can be perched on a shelf or on hooks.
A piece of fabric from my stash hides the stitches on the back.
That just makes it neat and complete.
🙂
 Have a most excellent rest of the week, my friends, and stitch away!

Embroidered Linen Table Runner

Linen purchased from Anna Maria Horner
 
Here’s a variation of the Madeira and Bias table runner that I shared in April.
I ventured away from the very traditional ecru and white linen
to a much more vibrant, contemporary color palette,
yet still using traditional fabric (linen).
 
 
The beautiful butterfly and bug embroidery up there at the edge
adds a sweet design element.
 
 
 The bug border is a stock multi-hoop design that was included with my Bernina (v.5) software.  I did not alter the design at all.  The size and colors were perfect for this pattern and fabric.  Love when that happens!
 
Here’s a picture of the back after I added the pinstitching.
When sewing a pinstitch, it is best to use stabilizer.
As you can see, I’ve not yet taken the time to meticulously
remove all those little bits of stabilizer that didn’t tear away.
Gotta’ be honest, I may not take the time!
(Just keepin’ it real)

 
Of course, the Madeira and Bias Table Runner can be made without embroidery.
There are so many options with this intro to heirloom class.
Watch for one more, very contemporary version in the near future.
 
The Madeira and Bias Table Runner project is a class that I offer.
Right now, you can make your own in my home studio.
No need to own an embroidery machine.
I offer full use of my machines to my students.
If you are in the local Utah area,
contact me by email to arrange for your personalized instruction.
 
In the near future, I hope to be teaching this in a larger class format at a local store.
In that case, you would need to own an embroidery machine to add that touch.
Either way, this is a fantastic way to experience beginning heirloom stitching.
 
Enjoy your weekend, my friends.


DIY Living Room Curtain Makeover

 
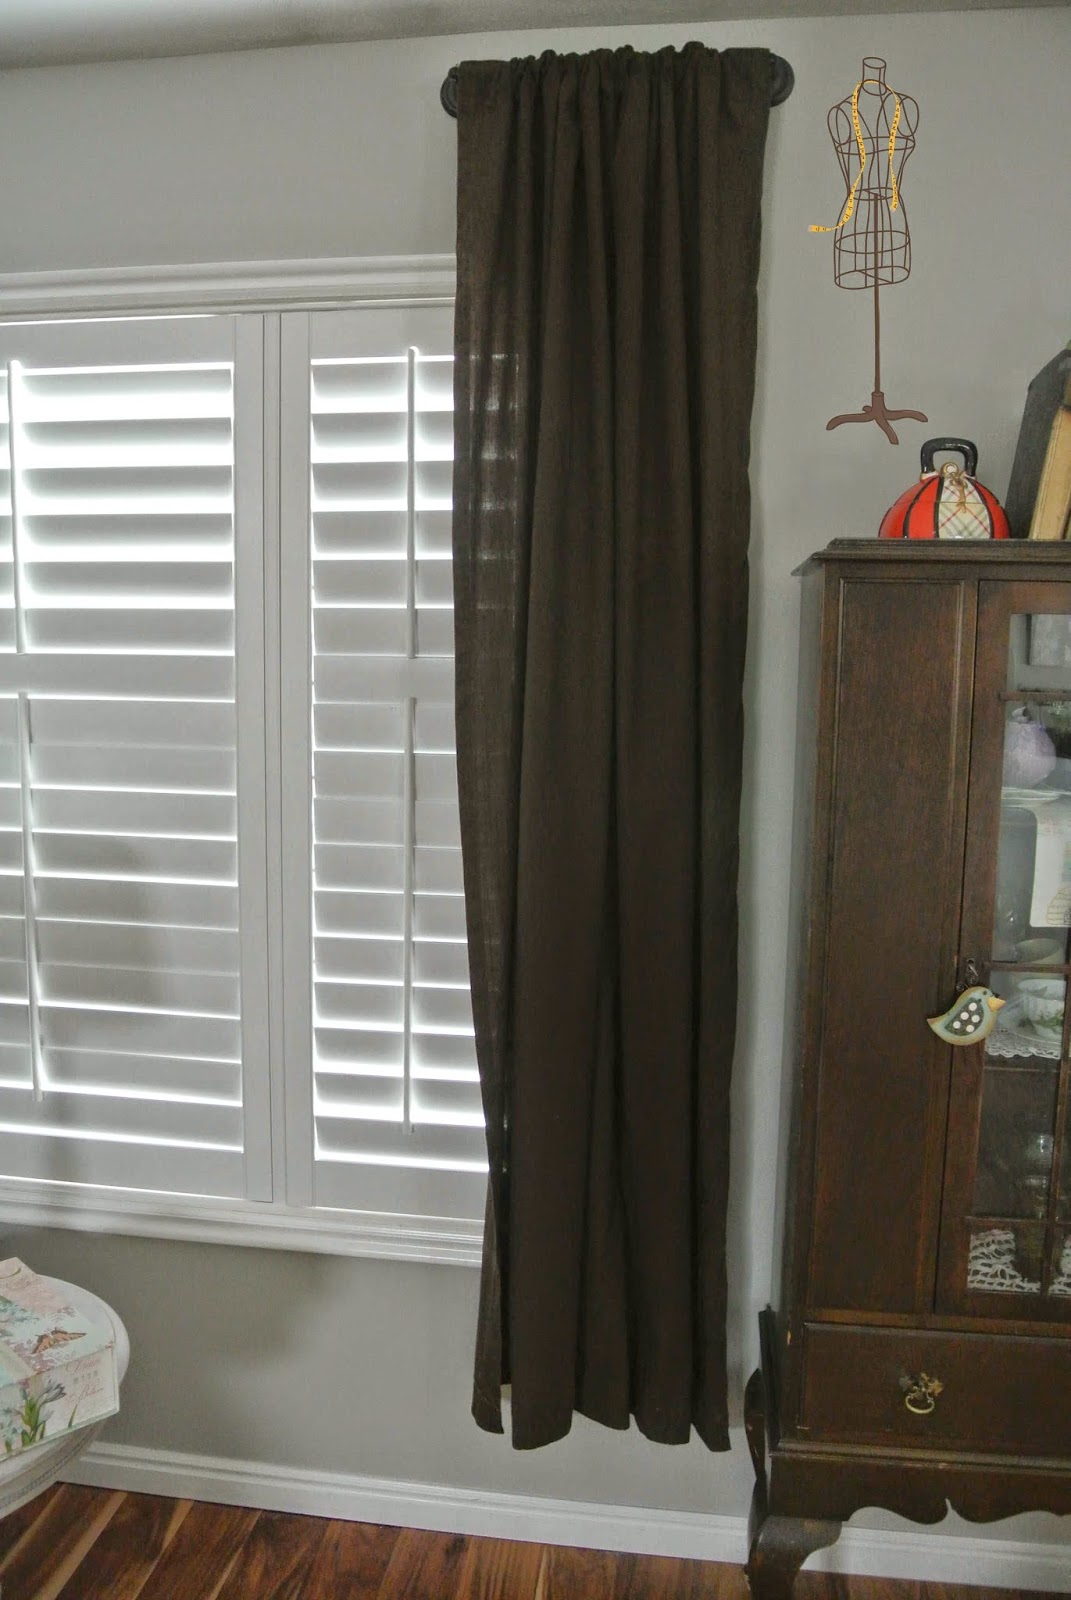
My living room curtains used to hang just above that window frame.
The room has vaulted ceilings, and after having them painted that serene blue/gray color,
I decided to raise the curtain height to better flow with the lines of the vaulted ceiling.
 
 
Of course, in doing so, the original 84″ long curtains ended up much too short.
Quite functional in a flood, but aesthetically dysfunctional!
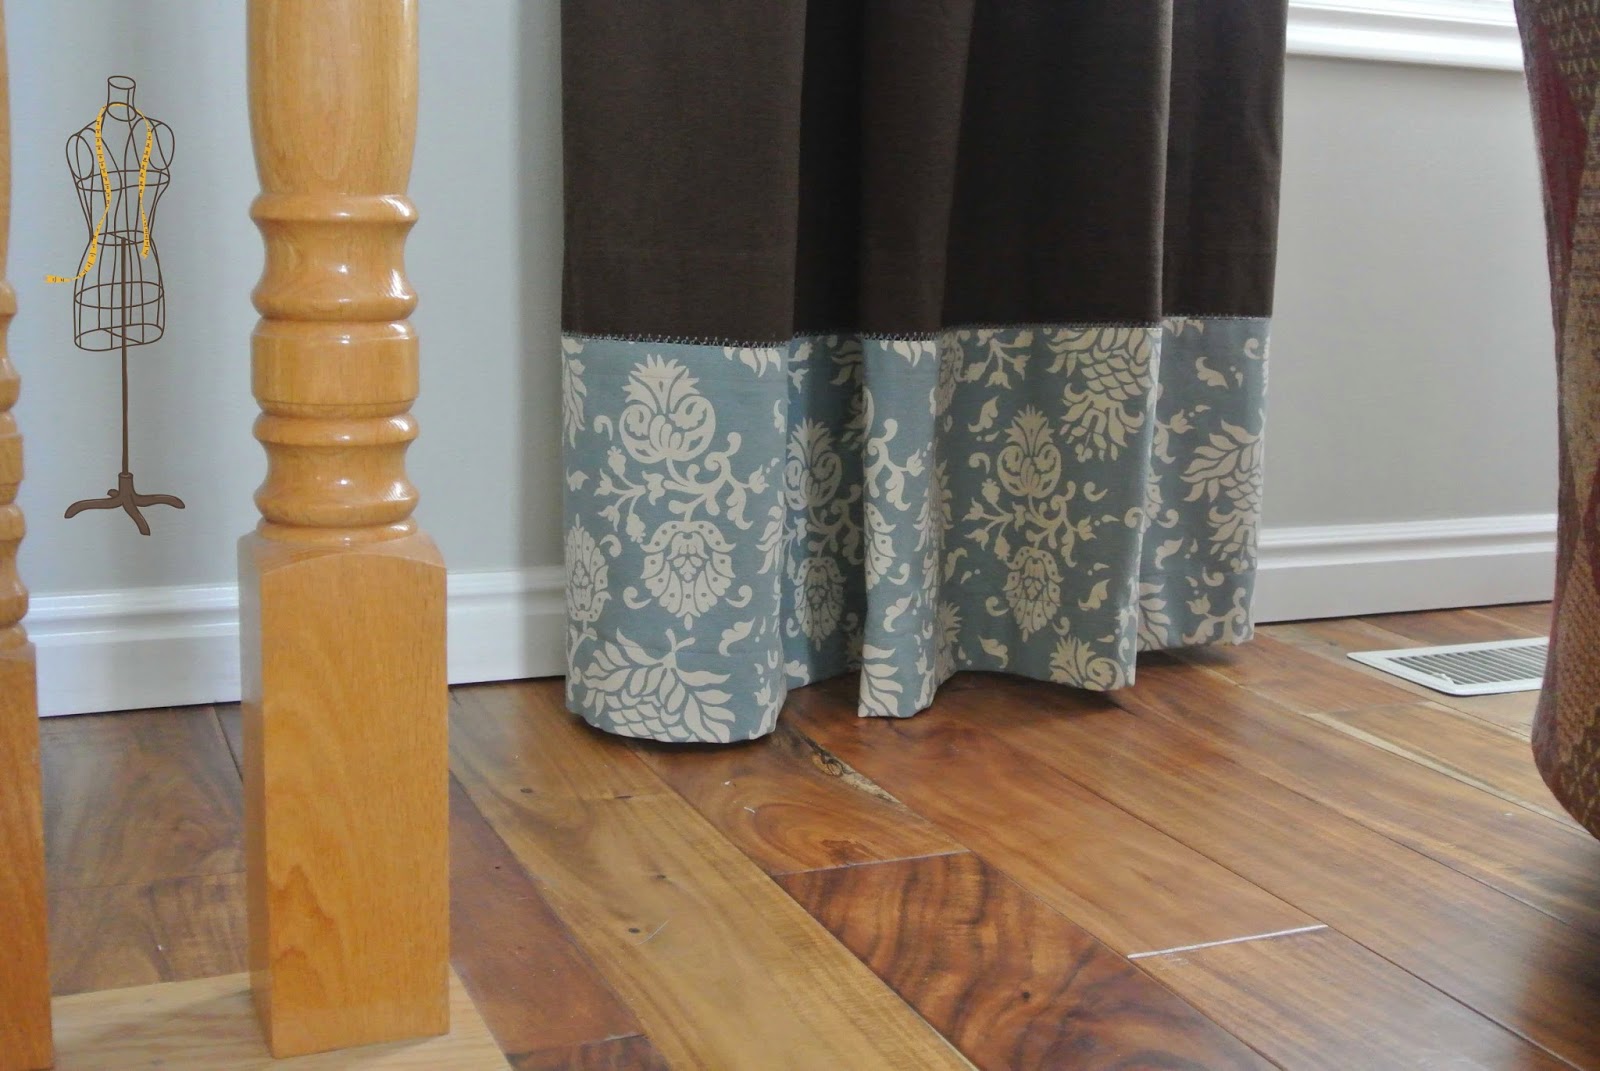
A brand new pair of 93″ long curtain panels was out of the question.
I have a limited budget, plus I would rather update and renovate what I already have.
 
 
I found this lovely blue and cream print decorator fabric on the remnant table at Hancock’s.
My existing curtains were 54″ wide and that lovely new fabric was 58″ wide.
Perfect!
 
All I needed was to cut two panels 15″ x WOF:
Hemming each 15″ side with a 1″ double fold hem gave me 54″ wide panels.
Serging the top edge of each panel and adding a 1″ single fold top hem,
plus 2.5″ double fold bottom hem gave me the extra 9″ length needed
for the new curtains.
 
 
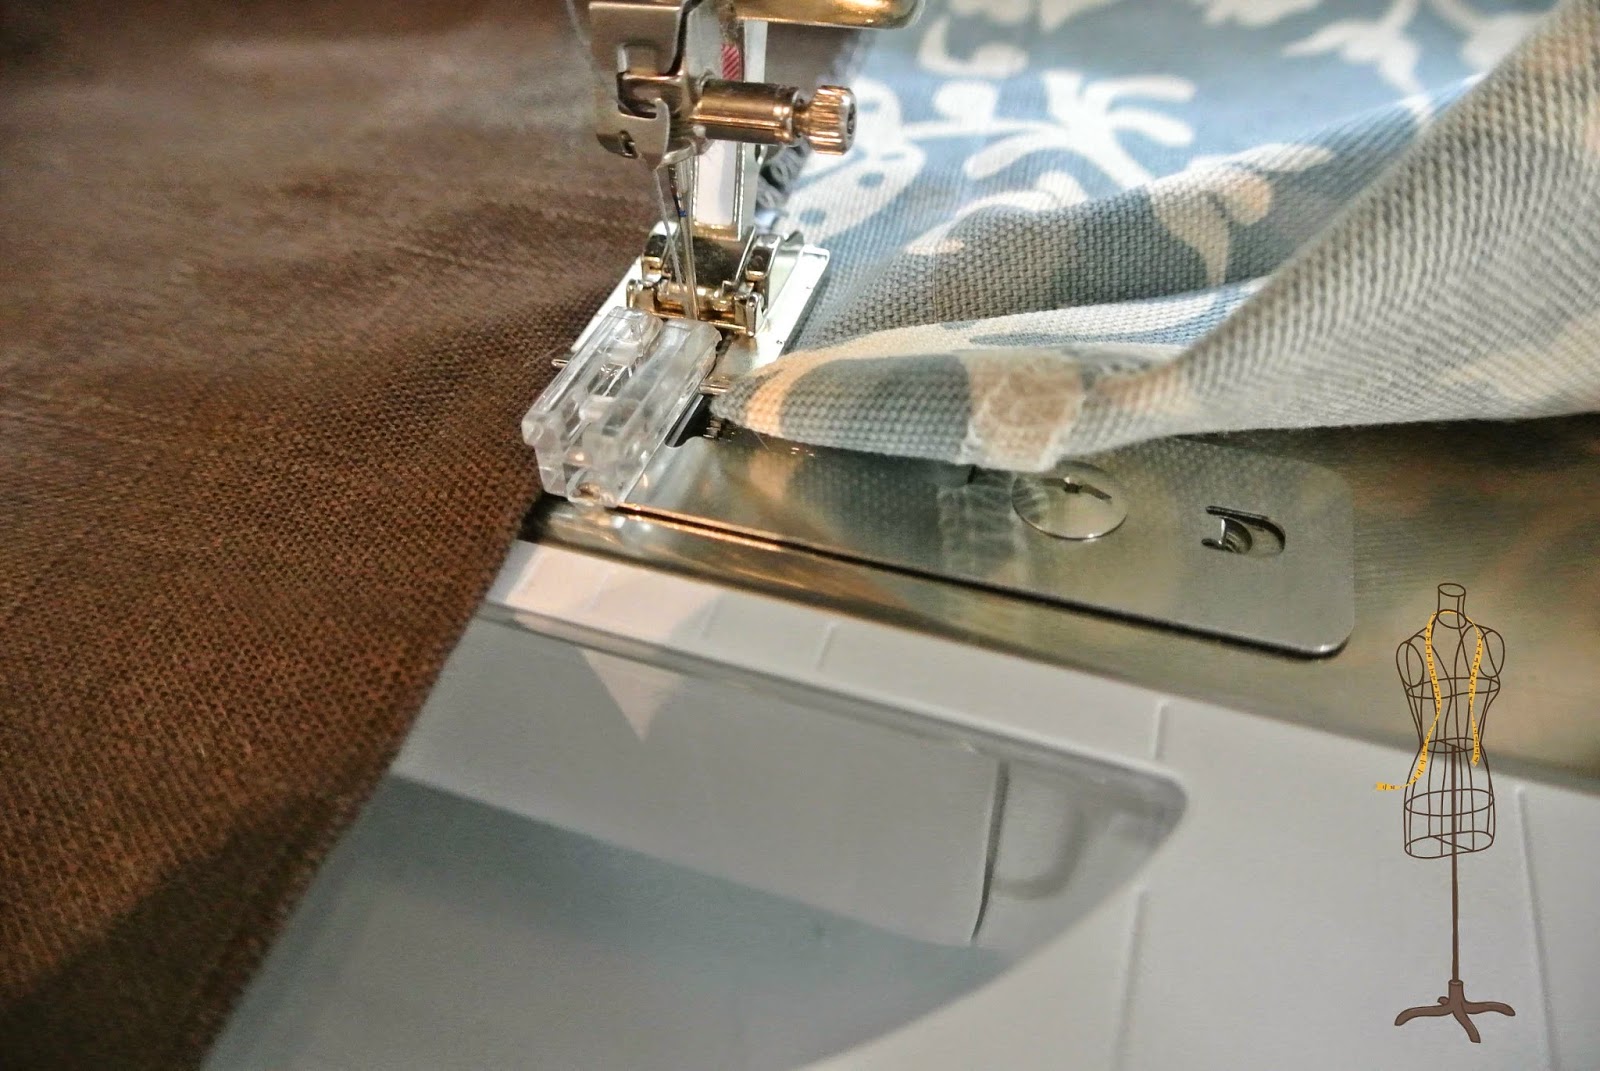
Why, you may ask did I completely finish off the panel addition before
attaching it to the existing curtain panel?
Rather than simply seaming the two pieces together,
I wanted that added length to look like it was intended rather than added.
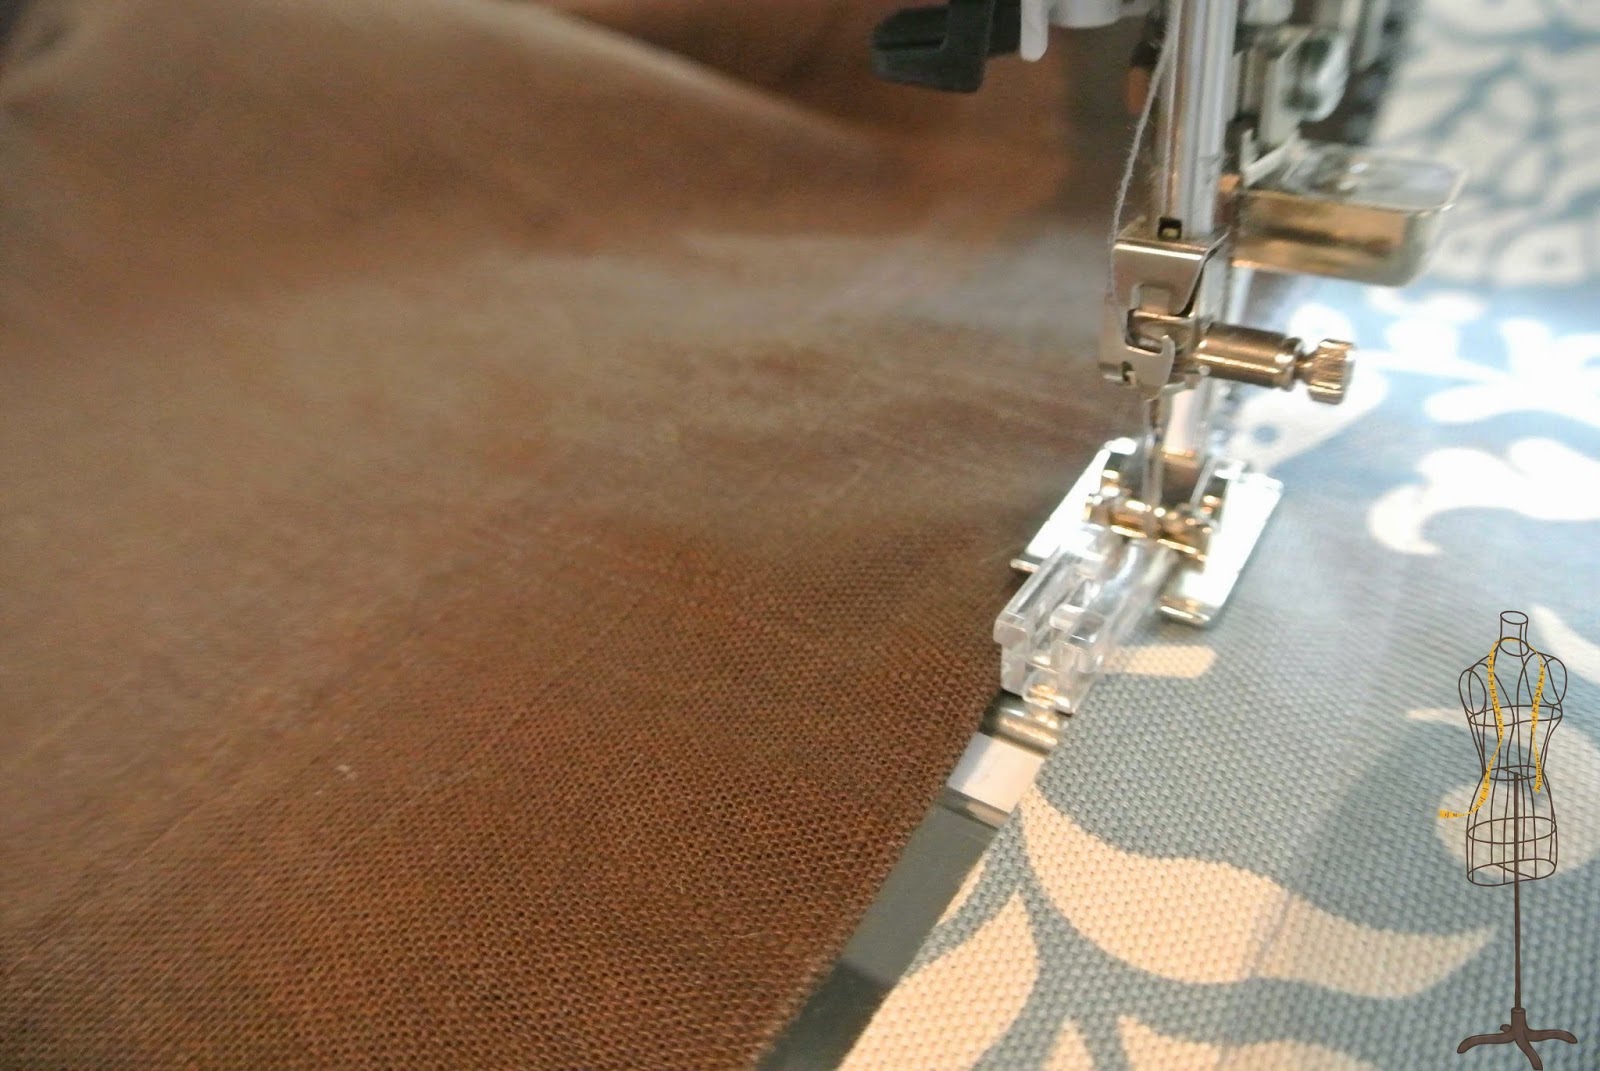
So I chose to attach it with a hemstitch.
Perhaps it is a bit unconventional to use an heirloom stitch to seam curtain panels,
but I *heart* the added detail.
Heavy duty thread adds to the strength of the stitch.
 
 
 The Bernina Spanish Hemstitch Attachment attaches easily to the base of the machine
and the clear guide sits in the center of the #20 presser foot.


That clear guide allows the fabric to glide smoothly and perfectly along either side
as the machine stitches.
This DIY Living Room Curtain Makeover offers optimal impact at minimal cost.
🙂
Happy decorating, my friends.

Â